House wrap is a crucial defense against the elements, shielding your home from rain, snow, and moisture that could penetrate the exterior siding. Creating a protective barrier prevents water from entering the wall cavity, safeguarding against wood rot, mold growth, and flooding. Available in various forms like fabric, paper, and board material, house wrap is installed over the exterior sheathing of house walls to offer reliable protection.

It's essential to understand that while house wrap is highly effective, it is only partially impermeable or waterproof. It cannot prevent water from entering the wall cavity if it comes from inside the home. In such cases, trapped moisture within the walls can lead to issues like rot, mold, and mildew. To ensure your home's protection, it is essential to choose the right type of house wrap that suits your needs.
This comprehensive guide will explore the different types of house wraps, discuss their advantages and limitations, and help you decide when selecting the best weather-resistant barrier for your home. Protecting your home with a reliable house wrap is critical in maintaining its structural integrity and preventing potential damage caused by water infiltration.
A house wrap is a protective layer that is installed on the exterior walls of a building before the siding or cladding is applied. It serves as a weather-resistant barrier, preventing water from infiltrating the wall assembly while allowing water vapor to escape, reducing the risk of mold and water damage. House wraps come in various materials, each with unique properties and benefits.

Felt paper, commonly called "felt," is a traditional house wrap material that has been utilized for a long time. While it offers essential weather resistance and is a temporary barrier during construction, it may not match the durability and effectiveness of modern synthetic wraps.
One prevalent type of house wrap is asphalt felt, which typically boasts a perm rating of around five, providing moderate water resistance and making it suitable for use as a sheathing wrap.
Pros
Cons
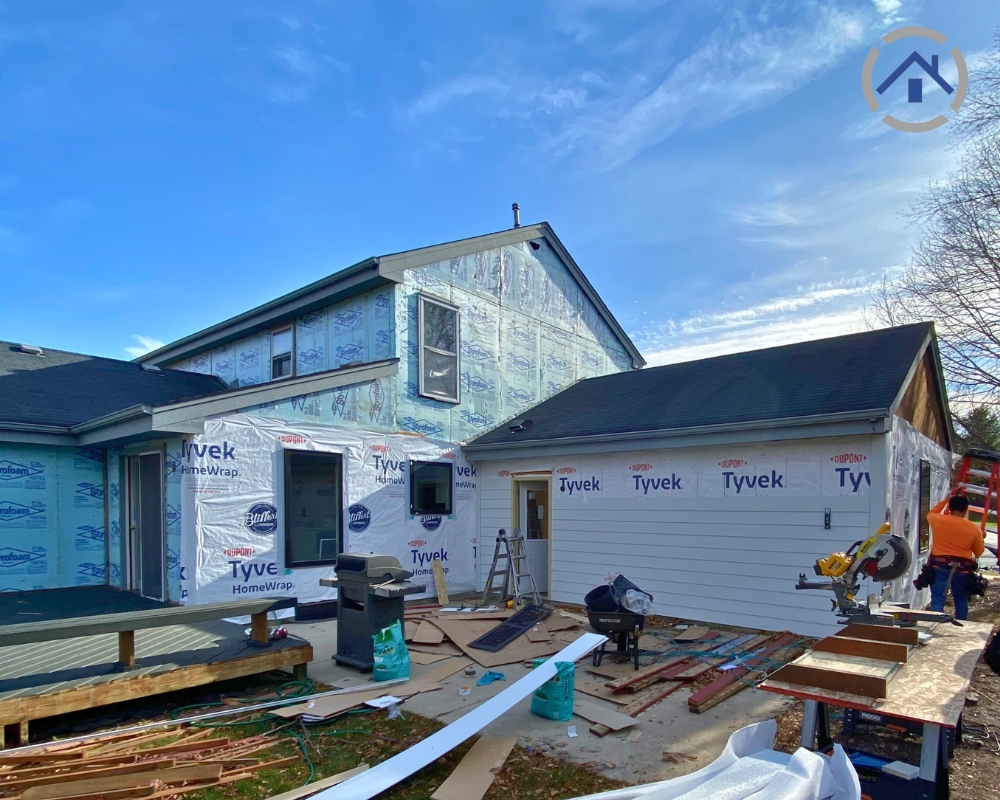
Spun-bonded polyolefin wraps, like Typar and Tyvek, have gained immense popularity in the construction industry due to their ability to resist moisture and air penetration while allowing water vapor to escape from the building's interior. These synthetic house wraps offer significant advantages over traditional options.
Polyolefin fabric may be the ideal choice if you're seeking a more reliable alternative to asphalt felt or grade D building paper. It functions as a plastic house wrap and comes in various options, such as woven, non-woven, perforated, and non-perforated, allowing you to select the most suitable type for your home's requirements.
Pros
Cons
While not a traditional house wrap, rigid foam insulation can serve as insulation and a weather-resistant barrier. It offers superior insulation properties and can significantly improve a home's energy efficiency. However, it is generally more expensive than other house wrap options.
Pros
Cons
Selecting the house wrap for your home is crucial to ensure optimal protection and energy efficiency. Here are some factors to consider when making your decision:
Consider the climate and typical weather conditions in your area. A highly moisture-resistant house wrap like Typar or Tyvek might be the best choice if you live with heavy rainfall or frequent storms. On the other hand, if you reside in a relatively dry climate, asphalt-impregnated paper may offer sufficient protection.
Extra tip:
We interviewed Alex, owner of a siding & windows company in the Sacramento & Bay area, and he gave us an extra tip:
"When choosing your house wrap, it's not just about picking a moisture-resistant product; it's also essential to consider breathability. In climates with significant temperature swings, such as what we have in various parts of California, a breathable wrap can help reduce the risk of condensation buildup within wall cavities. This condensation can cause mold, mildew, and even structural damage over time if not properly managed.
Alex Motron | Owner of Best Exteriors
Your budget will also play a significant role in the selection process. While synthetic wraps may have a higher initial cost, they often provide better long-term protection and energy efficiency, potentially offsetting the upfront expenses.
If energy efficiency is a priority, consider investing in a rigid foam insulation house wrap. It not only acts as a weather-resistant barrier but also significantly improves insulation, leading to reduced heating and cooling costs.
Look for a house wrap that is durable and designed to withstand the elements. A long-lasting material will save you from the hassle and cost of frequent replacements.
Properly installing a house wrap is relatively straightforward, provided it is done at the right time and with the appropriate tools. To ensure its effectiveness, house wraps should be installed after covering the house with plywood before installing windows and doors.
The timing and sequence of installation are essential factors in maximizing the benefits of the house wrap. Installing it correctly will enhance its ability to protect the home from moisture and other elements, contributing to the overall durability and longevity of the building's structure.
Before installing the house wrap, it's essential to seal any problem areas on the house, especially in wood structures. Look for cracks and gaps and pay particular attention to the areas around the roof. Seal as much as possible, especially in the east-west direction, where wind-driven moisture is more likely to enter during storms. Various sealants like caulk, wood filler, or primer-sealer can be used for outdoor sealing. Consult a contractor to determine the best option for your specific project.
Once problem areas are sealed, begin the wrapping process. Start from the bottom of the house and work your way up, like applying a screen protector to a phone. Depending on the type of house wrap chosen, you may need to secure it as you go periodically. Ensure that vertical overlaps are around 6 inches, and horizontal overlaps are approximately half that size. Extend the overlap beyond the frame for windows and doors and staple it on the other side for added protection.
Use glue, staples, or tacks to secure the house wrap. Many wraps come with a securing agent provided by the manufacturer. If yours still needs to include one, contact the manufacturer to inquire or seek advice from the hardware store where you purchased the wrap for alternative options.
After applying and securing the wrap, seal the top edges using tape designed for the type of sealer used. Pay attention to sealing all seams both vertically and horizontally. This final step is crucial in ensuring a watertight barrier. Once the area is well-sealed, you can add the siding of your choice, knowing that your home now has an effective moisture barrier.
Always start with a clean, dry surface to ensure proper adhesion and sealing. Pay close attention to overlaps and joints, as these areas are vulnerable to water infiltration. If you need more clarification on the installation process, consider hiring a professional contractor with experience in house wrap installation for the best results. Taking the extra time to install the house wrap properly will protect your home from potential moisture damage and increase its longevity.
Investing in a high-quality house wrap is fundamental for protecting your home from moisture and water infiltration. Whether choosing traditional asphalt-impregnated paper, synthetic wraps like Typar or Tyvek, or energy-efficient rigid foam insulation, selecting the right product for your needs is vital. With the proper house wrap and installation, your home will be well-protected, comfortable, and energy-efficient for years.
Although house wrap installation can be a DIY project, consulting a professional contractor with expertise in this field is highly recommended. Their skill ensures correct installation, maximizing protection and offering homeowners peace of mind.