When it comes to roof leaks, time is of the essence. Ignoring a small leak can quickly lead to significant damage in your home. Detecting a roof leak, identifying its source, and fixing it promptly can save you from extensive repairs and expenses down the road. Here’s a comprehensive guide to help you spot, diagnose, and address roof leaks before they worsen.
Detecting a roof leak early can prevent extensive water damage and costly repairs. The first and most obvious sign is water intrusion, often seen as puddles or damp spots inside the home. If you notice water on floors or dripping from ceilings after heavy rain, it’s a clear indicator of a leak.
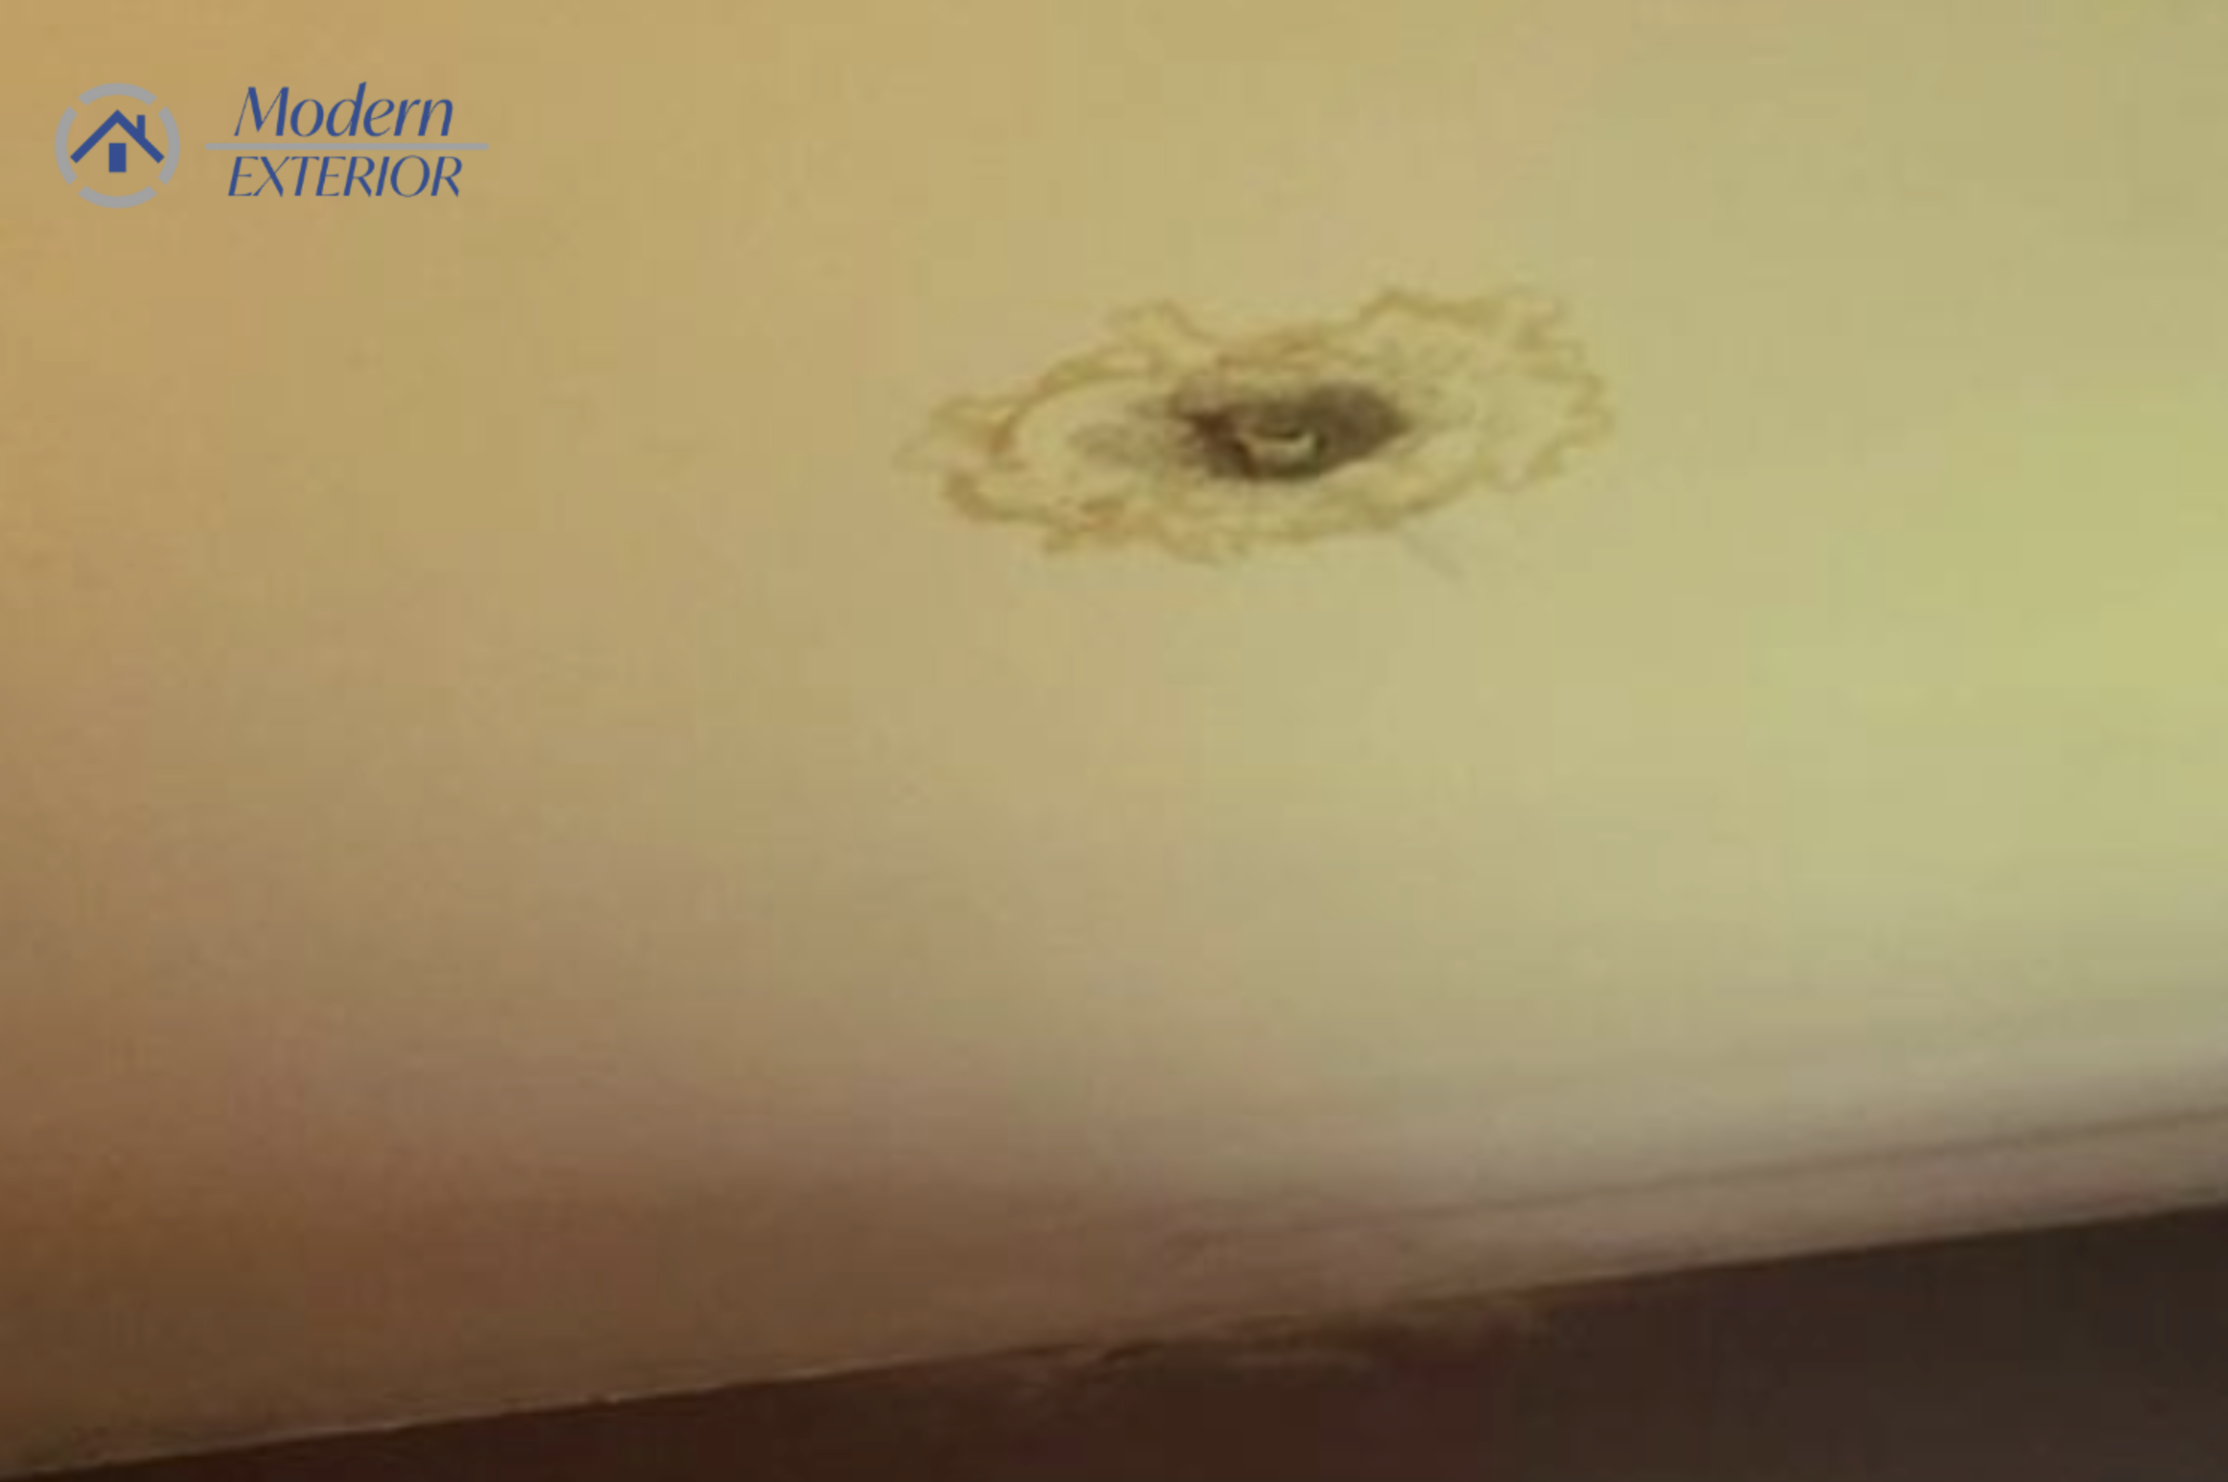
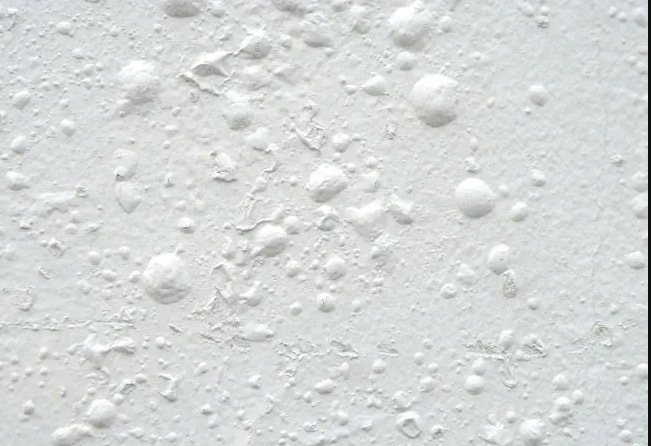
Beyond visible water, watch for staining or discoloration on ceilings and walls, usually in a yellowish or brown color. These stains indicate water is seeping through the roof, even if you don’t see active drips. In some cases, you may also notice bubbling or peeling paint on walls, which signals that moisture is accumulating under the surface, loosening the paint.
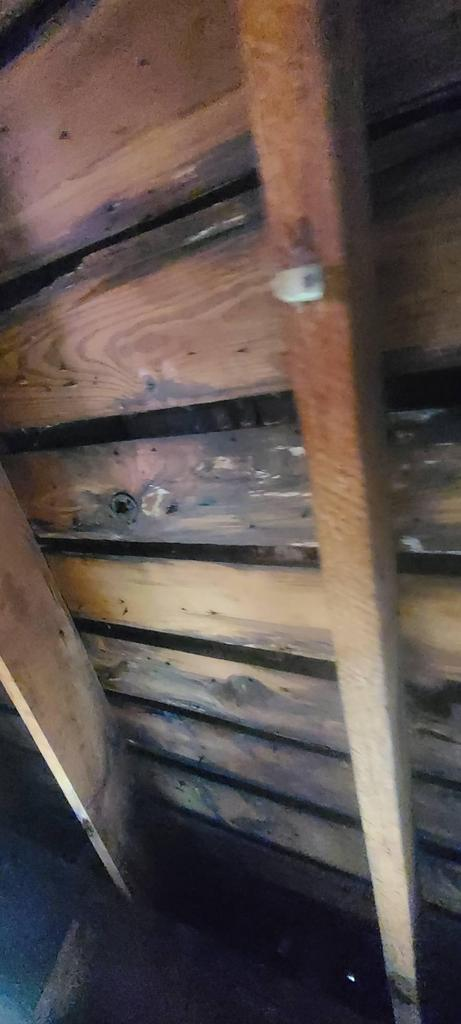
For less visible leaks, inspect your attic. Compressed or damp insulation often suggests water intrusion, as insulation tends to absorb moisture, causing it to clump or flatten. Also, look at the roof decking for any dark or discolored spots, which can indicate past or ongoing leaks. Regularly checking your attic for these signs, especially after a storm, can help you detect leaks before they worsen and spread to your home’s interior, allowing you to address them swiftly and prevent further damage.
Once you’ve identified that there’s a leak, the next step is to determine its cause. Roof leaks can be tricky to trace, as water often travels along the interior framework before appearing as a visible drip or stain. Here are steps to help you pinpoint the source of the leak:
Begin by examining the attic in the area where you noticed water damage. Use a flashlight to inspect the wood beams, insulation, and roof decking, looking for water trails that may indicate where the leak starts.
If you feel comfortable and safe doing so, inspect the roof’s surface from the outside. Look for these potential issues:
By thoroughly investigating the attic and roof surface, you can narrow down the potential sources of the leak and determine where repairs are needed.
One of the most obvious signs of a roof leak is water intrusion inside the home—often seen as puddles on floors or water dripping from ceilings. When water begins to pool indoors, it’s a clear indication that moisture has made its way past the roof’s protective layers and into your home. This can happen suddenly after a heavy rain or as a result of a slow, unnoticed leak over time.
Beyond visible puddles, there are other subtle indicators that you may have a roof leak. Stains or discoloration on walls and ceilings, especially on upper floors, often point to water seeping through the roof. These stains typically appear brown or yellow and may spread over time. In some cases, bubbling or peeling paint on ceilings or walls signals that water has become trapped beneath the surface, causing the material to warp.


Checking your attic for water damage is a great preventive step. Look for damp or compressed insulation and water stains on the underside of the roof decking. Wet or damaged insulation in the attic can indicate a leak even before water reaches the interior of your home. Regularly inspecting your attic, particularly after storms, can help catch leaks early.
Once water intrusion is detected, it’s essential to locate and repair the source of the leak. Look for missing shingles, loose nails, or gaps around roof features like vents and chimneys. Fixing leaks promptly protects your home from structural damage, mold growth, and additional repair costs.
Roof leaks often start subtly, but they can leave clues that are easy to spot if you know where to look. One of the next most obvious signs of a roof leak, after water puddles, is staining or bubbling in drywall. These changes in your walls or ceiling drywall are caused by moisture seeping through from the roof, often resulting in discoloration, bubbles, or even peeling paint.
When water seeps into your home from a roof leak, it often creates dark, yellowish-brown stains on drywall, especially on ceilings or upper walls. These stains generally appear in irregular shapes and may slowly expand as the leak persists. Often, these stains are more noticeable after rain, as the water accumulates in the attic and eventually soaks through the drywall.

Beyond discoloration, trapped moisture can also cause paint to bubble or peel away from the drywall. Bubbling paint is a result of water building up beneath the surface, loosening the bond between the paint and drywall. Over time, this bubbling can worsen, and sections of paint may start to peel or crack. In cases of severe leaks, you might even notice sagging drywall, which could mean that the water damage has weakened the ceiling’s structure.
If you suspect a roof leak but haven’t seen any water pooling or noticeable staining on ceilings, the next place to check is your attic. This often-overlooked space can reveal early signs of a leak before water reaches the living areas of your home. Two major indicators of water intrusion in the attic are insulation compression and staining on the roof decking.
Attic insulation is designed to be fluffy and expansive, maintaining an even appearance across the floor of the attic. When water leaks into the attic, it can weigh down the insulation, causing it to compress or clump together in certain areas. Compressed insulation loses its effectiveness, reducing your home’s energy efficiency and increasing heating and cooling costs. Check for areas where the insulation looks uneven, compacted, or visibly damp, as these can be early signs of a roof leak.
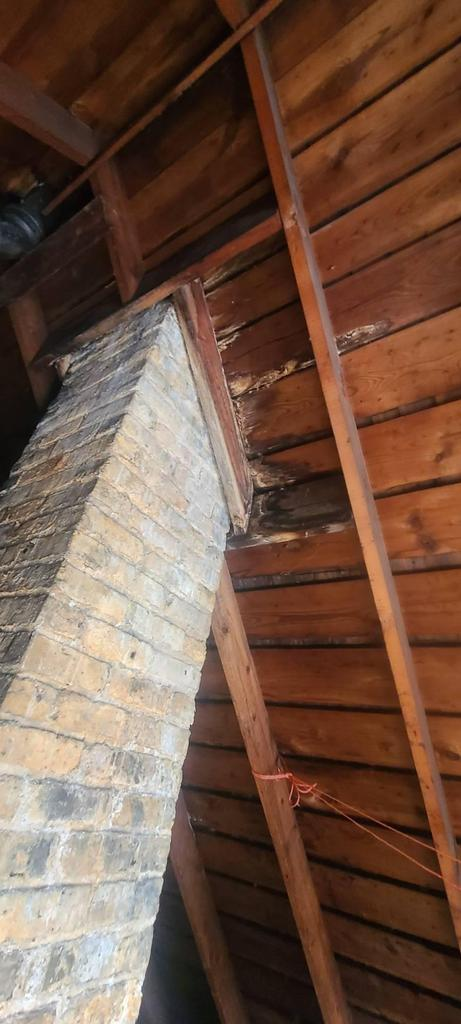
The roof decking (the wooden structure beneath the shingles) is another critical area to inspect. Water that seeps through the shingles often leaves visible stains on the decking, typically as dark or discolored spots. Stains are often more visible along seams or near roof features like vents, chimneys, or skylights. These stains may range from small spots to larger streaks, depending on the leak’s severity. In some cases, the wood may even feel damp to the touch, indicating recent water intrusion.
Finding the root cause of a roof leak can sometimes be tricky, as water often travels along structural elements before it becomes visible indoors. Starting your search in the attic can reveal clues about where water is entering and help you accurately identify the source of the problem. Here’s how to check for the cause of a roof leak from the attic.
Water stains or puddles on ceilings or walls may not always indicate the exact location of the leak. Since water can follow beams, pipes, or other structures within the attic, the spot where water accumulates inside your home may be several feet away from where the water actually enters. To get a clearer picture, examine the attic area around the stains or puddles you noticed indoors. Look for damp spots, water trails, or discolored wood that may trace back to the original entry point.
Roof penetrations, such as vents, chimneys, or attic breathers, are common sources of leaks. These areas rely on flashing and proper sealing to stay watertight, and even a small crack or gap around these features can allow water to seep in. When inspecting the attic, pay special attention to these roof accessories. Look for any signs of water stains or dampness in the wood or insulation near these features, as it could indicate that the seals or flashing have been compromised.
Examining the roof’s surface is essential when searching for the cause of a leak. Nail pops—where nails push up through the shingles—are a common source of leaks. These raised nails can create small gaps in the shingles, allowing water to enter. Inspect your roof for any protruding nails and hammer them back in place or replace them with new nails if they’ve loosened significantly.
Missing or damaged shingles are another telltale sign of a leak. Shingles that are cracked, curled, or absent create entry points for water. Replace any damaged shingles immediately to prevent further water infiltration.
Additionally, check the pattern of the shingles to ensure proper alignment. Misaligned or uneven shingles can result from poor installation and often leave small gaps or overlaps, increasing the risk of leaks. Ensuring the roof’s surface is in good condition helps keep your home dry and leak-free.
Once you’ve identified the source of a roof leak, addressing it quickly is key to minimizing damage and preventing costly repairs. The first step is to replace any missing or damaged shingles. Simply lift the surrounding shingles, slide the new ones into place, and secure them with roofing nails. To ensure a watertight seal, apply roofing cement around the edges. For leaks around roof features like vents, chimneys, or skylights, inspect the flashing for any cracks or loosening. Over time, flashing can wear out, allowing water to seep through. Resealing the flashing with roofing sealant or replacing it entirely will help restore the roof’s protective barrier.
Additionally, check for nail pops or loose nails, which can also cause leaks. Hammer any popped nails back into place and apply roofing cement to seal any gaps. If the nails are rusted or significantly loose, replace them to secure the shingles and prevent further leaks.
By directly addressing issues like missing shingles, damaged flashing, or loose nails, you can stop the leak at its source and protect your home from further water damage. Regular roof maintenance is essential to ensuring that your roof stays in good condition and to prevent future leaks from occurring.