Let's dive into the effects of incorrect gutter pitching and how you can spot the signs.
What Are the Effects of Incorrect Gutter Pitching?
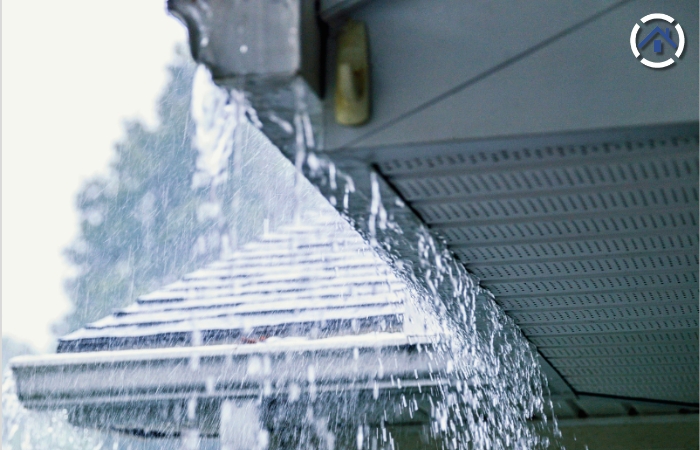
1. Water Will Go Over the Edge of the Gutter
When gutters are improperly pitched, water doesn't flow smoothly toward the downspouts. Instead, it can accumulate at various points in the gutter system and eventually overflow over the edge. This improper water flow can lead to several significant problems:
Landscaping Damage
Overflowing water can wreak havoc on your landscaping. As water cascades over the edges of your gutters, it can erode the soil around your home, washing away the nutrients your plants need to thrive. This erosion can damage flower beds, uproot shrubs, and create unsightly puddles and muddy areas. Over time, the constant flow of water can also compact the soil, making it harder for plants to grow and retain water.
Foundation Issues
Consistent water overflow from improperly pitched gutters can have severe consequences for your home's foundation. When water seeps into the ground near the foundation, it can cause the soil to expand and contract with changing moisture levels. This process can lead to cracks in the foundation, weakening its structural integrity. Over time, these cracks can grow, leading to more significant structural issues that can be costly to repair. Additionally, water near the foundation can lead to basement flooding and increased humidity levels inside your home, which can promote mold growth.
Visual Cues
Homeowners can look for several visual cues that indicate their gutters are improperly pitched and causing water overflow:
Water Stains on Exterior Walls: Brown or greenish stains on the walls beneath your gutters can indicate that water is overflowing and running down the exterior of your home.
Puddles Near the Foundation: After a rainstorm, check for standing water near the base of your home. Persistent puddles can indicate that water is not being directed away from your house as it should be.
Washed-Out Landscaping Mulch or Soil: Look for areas where mulch or soil appears to have been displaced by flowing water. This can be a clear sign that your gutters are not properly channeling water away from your home.
2. Water Will Go Behind the Gutters, Gutter Apron to Your Fascia and Soffit
Improperly pitched gutters can cause water to seep behind them instead of flowing through the gutter system as intended. This seepage can significantly affect the fascia and soffit, leading to various problems:
Fascia and Soffit Damage
When water seeps behind improperly pitched gutters, it can infiltrate the fascia and soffit—the wooden or metal boards running along the edge of your roof and the underside of your roof overhang, respectively. Constant exposure to moisture can cause the fascia and soffit to develop wood rot. This weakening of these structural components can lead to:
Wood Rot: Water-soaked wood begins to break down, becoming soft and crumbly. This rot can spread, compromising the strength and stability of your roof's edge.
Pest Infestations: Rotting wood can attract pests like termites and carpenter ants, which further damage the structure and create additional problems.
Costly Repairs: Replacing rotted fascia and soffit boards can be expensive and time-consuming, especially if the damage is extensive.
Structural Damage
Prolonged exposure to moisture from improperly pitched gutters can also compromise the overall integrity of your roof and walls:
Roof Damage: Water can seep under the shingles and into the roof decking, leading to rot and deterioration. This can result in leaks, mold growth, and a weakened roof structure.
Wall Damage: Moisture can infiltrate the walls of your home, causing insulation to become damp and less effective. Over time, this can lead to mold growth inside the walls, which poses health risks and requires significant repairs to address.
Inspection Tips:
To catch water damage early and prevent extensive repairs, regularly inspect the areas around your gutters and roofline for signs of trouble:
Peeling Paint: Paint peeling or bubbling on the fascia or soffit can indicate moisture infiltration.
Water Stains: Look for dark or discolored patches on the fascia, soffit, or walls. These stains can signal water seeping behind the gutters.
Soft or Rotting Wood: Gently press on the fascia and soffit boards. If the wood feels soft, spongy, or crumbles under pressure, it likely has begun to rot and requires immediate attention.
Other Consequences of Improperly Pitched Gutters:
Beyond the immediate issues, there are other potential problems to consider:
Mold and Mildew Growth: Moisture accumulation can create a breeding ground for mold and mildew, which can affect indoor air quality and pose health risks.
Ice Dams: In colder climates, improperly pitched gutters can lead to ice dams, which can damage your roof and gutters and cause leaks inside your home.
Gutter Detachment: The added weight and pressure from water buildup can cause gutters to detach from your home, leading to even more damage.
How to Identify and Correct Improper Gutter Pitch?
To ensure your gutters are properly pitched, start with a DIY inspection using a level. Ideally, they should slope about a quarter inch for every 10 feet toward the downspouts, ensuring effective water flow. However, for thorough assessment and correction, especially to prevent long-term issues like water damage and structural decay, it's essential to have a professional evaluate your gutter pitch.
Steps to Properly Pitch a Gutter:
Tools and Materials You'll Need:
Ladder
Measuring tape
Chalk line or string
Level
Pencil or marker
Drill or screwdriver
Gutter hangers or brackets
Screws
Step-by-Step Guide:
Safety First: Ensure you have a stable ladder and someone to assist you if possible. Wear safety gear such as gloves and eye protection.
Measure the Length of the Gutter Run: Measure the entire length of the gutter run from end to end. Determine the location of the downspout. Typically, the downspout is placed at one end of the gutter run or in the middle for long runs.
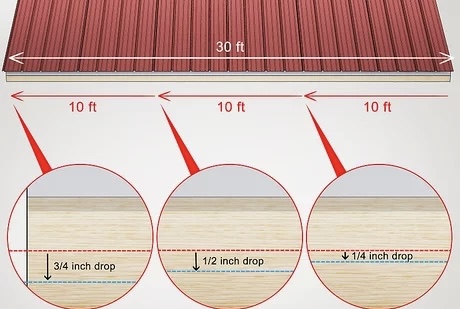
Calculate the Pitch: The standard pitch for gutters is about 1/4 inch for every 10 feet of gutter. This ensures proper water flow. For example, if your gutter run is 30 feet long, the difference in height between the high end and the low end should be 3/4 inch (30 feet x 1/4 inch per 10 feet).
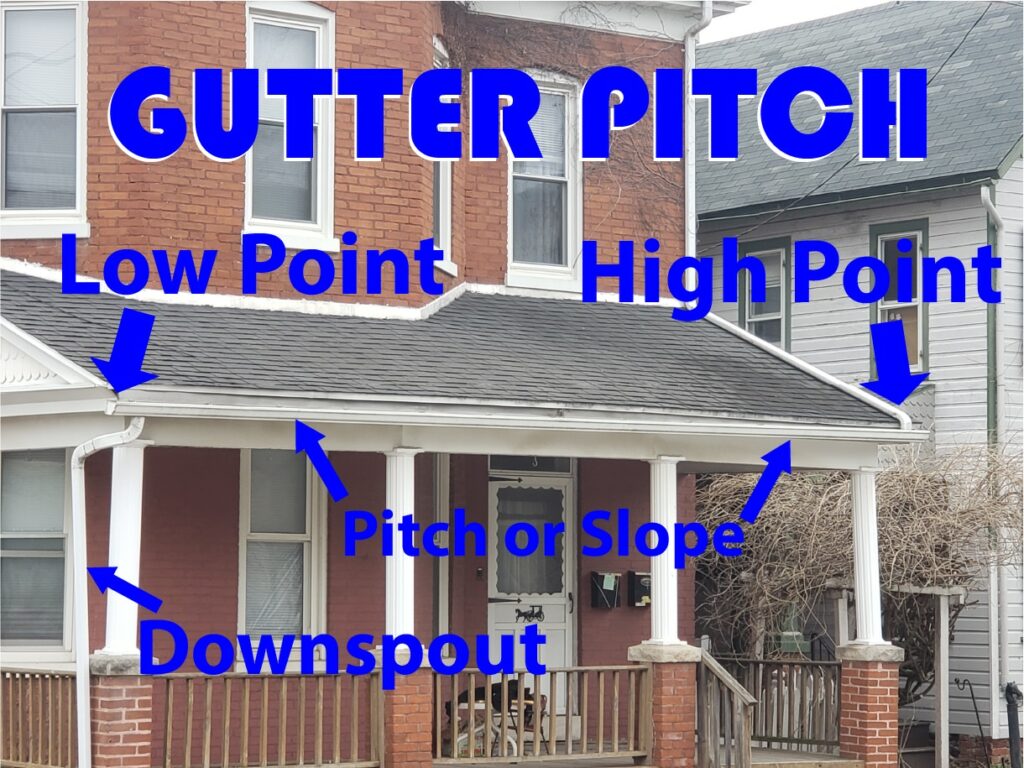
Mark the High Point: At the high end of the gutter run, measure down from the roofline or the top of the fascia board and make a mark. This mark indicates where the top edge of the gutter will be. Use the level to ensure the mark is straight horizontally.
Mark the Low Point: Move to the other end (or where the downspout will be) and measure down the calculated pitch distance from the high point mark. Make another mark at this point to indicate where the top edge of the gutter will be at the low end.
Snap a Chalk Line: Use a chalk line or string to create a straight line between the high point and the low point marks. This line will guide the installation of the gutter hangers.
Install Gutter Hangers or Brackets: Starting at the high point, install the first gutter hanger at the mark. Continue installing hangers along the chalk line, spacing them about every 24-36 inches. Ensure each hanger aligns with the chalk line to maintain the proper pitch.
Attach the Gutters: Lift the gutter sections into place and secure them to the hangers. Ensure the gutter follows the chalk line and maintains the correct pitch. Connect gutter sections with connectors and seal joints with silicone sealant to prevent leaks.
Check the Pitch: Once all sections are in place, use a level to check the pitch. Place the level inside the gutter and ensure it shows a slight tilt towards the downspout. Adjust the hangers if necessary to achieve the correct pitch.
Install the Downspouts: Attach the downspout to the gutter outlet and secure it to the wall of your home. Ensure the downspout directs water away from the foundation of your home.
Test the System: Use a garden hose to run water through the gutter system and check for proper flow towards the downspout. Check for any leaks or areas where water pools and adjust as necessary.
Conclusion:
Properly pitched gutters are crucial for protecting your home from water damage. They ensure that rainwater flows correctly to the downspouts and away from your foundation, preventing potential issues like soil erosion, foundation cracks, wood rot, and mold growth. Regularly checking and maintaining the pitch of your gutters can save you from costly repairs and keep your home safe and dry.
If you suspect any issues with your gutter pitch, it's essential to consult with professionals who can provide a thorough inspection and expert repairs. Remember, taking care of your gutters is a key part of maintaining a healthy, protected home.