As you look forward to a future roof replacement, anticipating a successful outcome is natural. However, it's essential to be well-prepared and informed about what to expect during this process. Roof replacements involve a lot of debris, waste, and nails from the torn-off roof, posing potential risks to your property. Therefore, knowing how to protect your home's exterior is crucial to ensuring the project's completion and success.
Here are some essential ways to safeguard your property during this project.
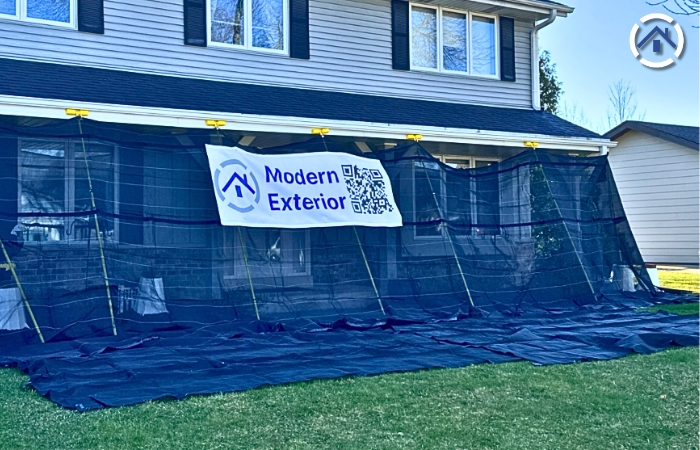
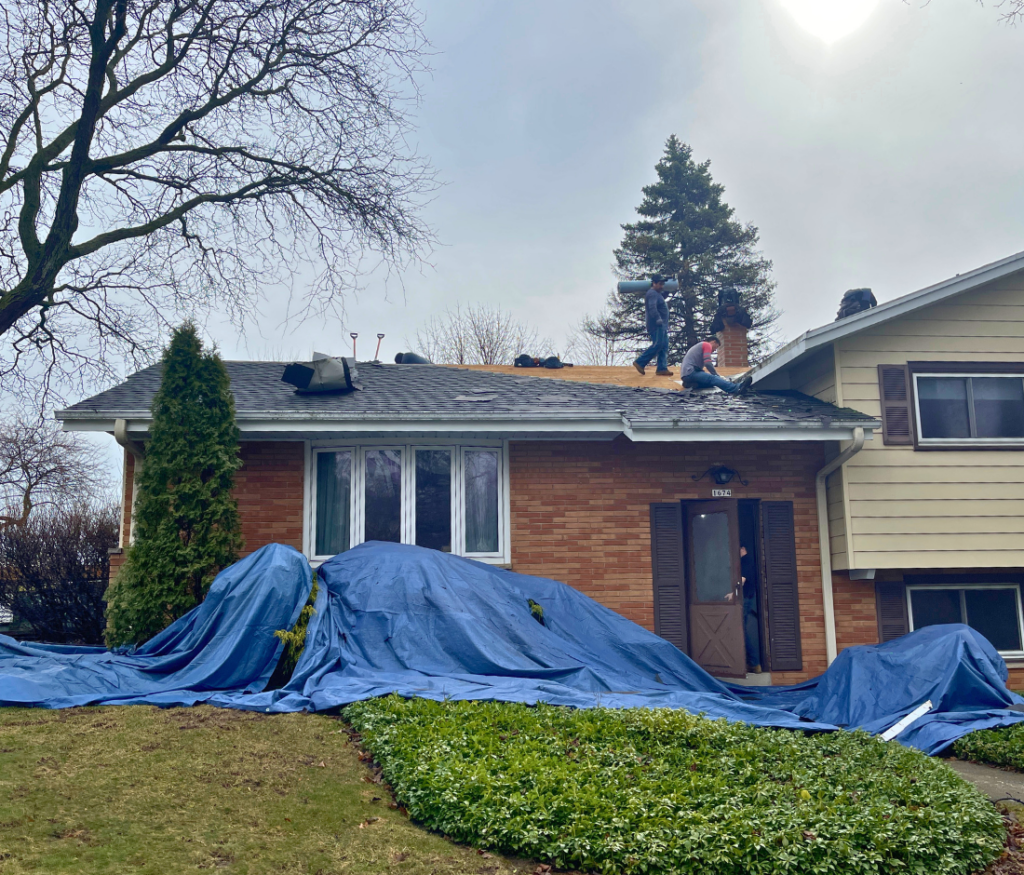
Tarping is a proactive and practical approach that safeguards your home's exterior and streamlines the roofing process, ensuring efficiency and minimizing potential risks and inconveniences.
Tarping serves as a crucial protective measure during roof replacement projects, safeguarding your siding from potential damage while ensuring your home's exterior remains intact. By strategically placing tarps over vulnerable areas, such as windows, walls, and landscaping, you create a barrier that shields against falling debris, stray nails, and other hazards associated with roofing work.
Beyond mere protection, tarping also facilitates the smooth flow of the replacement process. As the old roof is removed and the new one installed, tarps provide a surface upon which debris can easily slide off, preventing it from accumulating on your property or harming surrounding structures. This not only maintains the cleanliness and safety of your premises but also expedites the cleanup phase once the project is complete.
In addition to tarping, laying wooden boards angled against your home's exterior is another effective method of safeguarding your property during roof replacement. You create a sturdy barrier that deflects falling debris away from these vulnerable features by strategically placing these boards along walls, particularly near areas with delicate landscaping such as plants, bushes, and flowers.
Moreover, the angled placement of the boards encourages debris to slide off smoothly, directing it away from your home and landscaping. This proactive measure minimizes the risk of damage and contributes to a more efficient cleanup process once the roof replacement is complete.
Knowing which areas or items on your property need to be covered during a roof replacement is essential. Taking these protective steps will ensure that your property remains safe from damage or contamination and that the entire roofing process runs smoothly. By investing a bit of effort in comprehensive protection, you are providing your home and belongings with a shield against any potential mishaps. This will pay off big time in terms of peace of mind and a hassle-free roofing experience.
Your HVAC (Heating, Ventilation, and Air Conditioning) system needs protection from falling debris during roof replacement. However, if your roofing contractor lacks creativity and simply places a wooden board over the HVAC unit, as is sometimes done, it could inadvertently obstruct airflow and undermine its effectiveness. Instead, opt for a more comprehensive approach. Consider using specialized HVAC covers designed to shield the system from debris while allowing proper ventilation. These covers ensure uninterrupted airflow, safeguarding your HVAC system's efficiency and longevity throughout the roofing process.
If you have a pool on your property, it requires thorough protection during roof replacement to prevent debris from contaminating the water. Your roofing contractor should cover the entire pool with a new, fresh out from the wrapper tarp to ensure maximum protection. Using a fresh tarp is crucial, as older ones may have tears or imperfections that allow debris, particularly fiberglass from torn-off shingles, to seep into the water.
By employing a new tarp, you effectively shield your pool from contamination, preserving its cleanliness throughout the roofing project.
Clearing your patio or deck of all furniture, lights, planters, and other items is essential to prevent damage during roof replacement. Even lightweight objects can become projectiles in windy conditions or may suffer damage from falling debris.
By relocating everything off these outdoor spaces, you can minimize the risk of expensive damages and ensure a secure work environment for the roofing team. This proactive measure significantly reduces the chances of tools, equipment, or materials accidentally harming your belongings during the roof replacement process.
Moreover, clearing these areas will streamline the roofing process, providing contractors with ample space to work efficiently without obstruction. This facilitates smoother workflow and enhances safety on the job site, as it reduces the likelihood of accidents or injuries resulting from cluttered surroundings. Therefore, taking the time to prepare outdoor spaces by relocating items protects your property and contributes to a more seamless and productive roof replacement project.
Protecting your attic space is crucial during roof replacement to prevent debris from entering and causing potential damage or contamination. Depending on your attic's layout and your preferences, you have several options for safeguarding this area.
One approach is to cover the ceilings with plastic sheeting, creating a tent-like enclosure that shields against falling debris while still allowing for ventilation. Alternatively, you can lay tarps or plastic over any exposed surfaces or belongings in the attic.
If your property lacks an attic space or if you're unconcerned about its contents, this protective measure may not be necessary for your roof replacement project. However, for those with an attic, ensuring its protection is integral to maintaining the integrity of your home during the roofing process.
Investing in effective strategies to safeguard your home's exterior during roof replacement isn't just about practicality; it also reflects responsible homeownership and long-term asset management. By ensuring the protection of your property, you demonstrate an understanding of its value and the importance of its preservation.
Additionally, communication with your roofing contractor is paramount to ensuring the protection of your home exterior and property during roof replacement. Clear and effective communication enables you to convey any concerns or specific needs you may have regarding the protection of your property. By discussing these matters with your contractor, you can collaborate on strategies to minimize potential damage and ensure that necessary precautions are taken.
Getting a new roof can be a bit tricky, but dealing with your insurance company can make it easier. This blog is here to guide you through the process of insurance-covered roof replacement and help you have a smooth and successful experience.
We'll break down everything from understanding your insurance to going through the necessary steps. Our goal is to give you the info you need to make smart choices. We’ll go through the important steps and things to think about, making the whole roof replacement thing easier for you.
Here are the key stages involved in the process of replacing your roof with the assistance of your insurance.
1. Roof damage assessment:
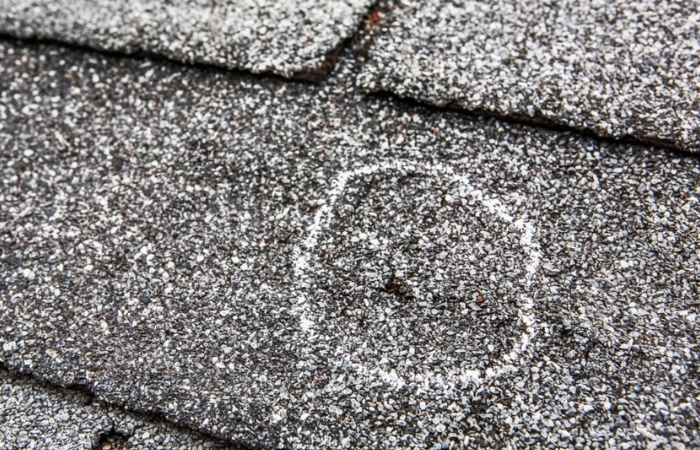
Begin the process by utilizing the assistance of a local contractor to conduct a thorough evaluation of your roof's condition. This step involves a detailed inspection to identify any potential issues, such as hail damage or leaks.
Collaborating with a local contractor provides valuable insights into the specific needs of your roof and ensures a comprehensive understanding of the damage. This initial assessment is foundational, laying the groundwork for the subsequent steps in the insurance claim process. The contractor's expertise enhances the accuracy of the evaluation, allowing for a more informed discussion with the insurance adjustor in the next phase.
2. Assessment from the Adjustor:
Upon calling the insurance company to file a hail claim or any other type of claim, the customer is assigned a claim number. Following this, an adjuster appointment is scheduled, or an inspector from the insurance company conducts a comprehensive 360-degree home inspection. During this inspection, adjusters are actively searching for evidence or correlating information to support the claim.
Through this assessment, the adjuster compiles a report and forwards it to the desk adjuster for further evaluation.
3. Desk Adjuster Review and Approval Decision:
Following the adjustor appointment, the findings are forwarded to the desk adjuster for a comprehensive review. This desk adjuster assesses the information provided and makes a decision on whether to approve or deny the claim. The approval hinges on the extent of the damage and the alignment with the insurance policy coverage.
4. Communication with Contractor:
Once the claim is approved, the insurance company initiates contact with the chosen contractor to start the repair or replacement process. This communication marks the beginning of the collaboration between the homeowner, the insurance company, and the contractor to ensure a smooth and timely resolution. The contractor, in turn, can start the necessary preparations and coordination for the upcoming roof work.
After the homeowner selects a roofing contractor, the company's representative will forward the quote to the insurance company. This facilitates improved communication and streamlines processes. In certain instances, after the approval of a claim, the insurance company may also send estimates directly to the homeowner or contractors.
In the state of Wisconsin, there is no prescribed minimum requirement for roofing jobs to be covered by the insurance company. However, it is recommended that you leverage your insurance coverage when the cost of the job surpasses the minimum deductible mandated for payment by homeowners. This approach ensures homeowners can make the most of their insurance benefits when undertaking roofing projects exceeding the stipulated deductible amount.
Another thing to remember is that your insurance provides coverage for both roof repair and replacement, but it only applies to damage resulting from specific covered events. If you are seeking to replace your old roof without such qualifying damage, you won't find your insurance a viable solution for financing the job.
Typically, insurance companies don't necessitate specific documents. The adjuster appointment or meeting serves as a comprehensive process where all essential information is gathered to facilitate the approval and subsequent payment of the claim. During this interaction, the adjuster assesses the details and documentation related to the claim, ensuring a thorough and efficient resolution process.
A thorough and meticulous approach to the insurance-covered roof replacement process is crucial for homeowners embarking on this significant journey. This involves a detailed assessment of the roof's condition, collaborative engagement with skilled professionals, and strict adherence to the intricacies of insurance policy details.
By going further into the nuanced steps and implementing proactive measures, homeowners can profoundly influence the overall outcome, facilitating a smooth transition from the initial damage assessment to the comprehensive restoration of a secure and resilient roofing system. This methodical approach serves as the cornerstone of safeguarding one's investment in one's home and ensures long-term protection against potential issues.
Are you planning a roof replacement and have been asking yourself, "Am I in need of skylight replacement, too? Absolutely! It is highly advisable to consider replacing your skylights concurrently with your roof.
When planning a new roof installation or replacement, it's essential to consider carefully whether you also want to replace any skylights. This decision can impact your property's look and its practical features, including energy efficiency, insulation, and durability. By coordinating these upgrades simultaneously, you can achieve a more cohesive and effective solution that optimizes the performance and longevity of your roof and skylights.
Determining whether a skylight replacement at the same time as your roof requires careful evaluation of various factors. Here are some factors to consider that may help you make a definitive decision.
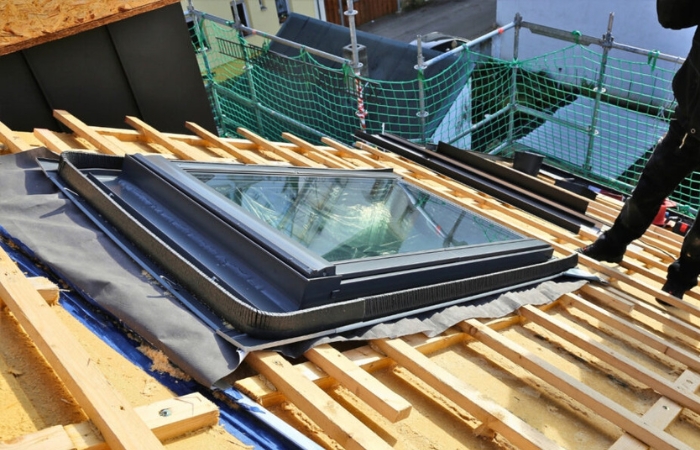
1. Age and Condition of Skylights: If your skylights show signs of aging or wear, it is worth considering replacing them when undertaking a roof replacement project. This is particularly relevant if the skylights are as old as the roof itself because replacing them simultaneously ensures that both components align in terms of longevity and performance.
2. Compatibility with New Roofing Material: It is important to prioritize the compatibility of your existing skylights with the new roofing material when replacing your roof. If there is a mismatch, it is advisable to opt for a skylight replacement. Ensuring that the skylights and the new roofing material are in harmony enhances the aesthetic appeal of your roof and guarantees optimal performance and longevity. Therefore, it is a crucial consideration in your overall roofing upgrade strategy.
3. Cost Efficiency: If you are considering replacing your skylights, it can be cost-effective to have it done concurrently with your roof work. By doing so, you may be able to save on labor costs since the installation process can be streamlined as a single project. If you delay the skylight replacement until after the roof work is completed, it may lead to extra expenses and labor, which can be avoided by planning the upgrade simultaneously with the roofing project. Therefore, it is advisable to consider this option when planning your roofing project.
4. Potential for Damage: If you have skylights on your roof, you should consider their safety during roof replacement. Skylights are vulnerable to damage during construction, so it's important to assess their sturdiness. If you notice any signs of weakness or susceptibility to harm, replacing them at the same time as the roof may be safer. This proactive approach will reduce potential risks during construction and ensure that your skylights remain safe and intact within the updated roofing system for a long time.
As you decide to replace your roof, it's important to remember that proactive planning can save you money in the long run. Replacing skylights at the same time as your roof can help you avoid complications and labor costs later on.
To get a better understanding of the best options for your specific situation, it's recommended that you consult with roofing experts. They can give you personalized advice and help you make the best choices for your roofing and skylight needs. By considering these factors and seeking professional guidance, you can make well-informed decisions that improve your property's functionality, aesthetics, and safety.
A roof replacement is a significant undertaking for any homeowner. It's a project that not only enhances the aesthetic appeal of your home but also ensures its structural integrity and protection. While the focus is often on selecting the right roofing materials and finding a reputable contractor, there's one crucial aspect that should never be overlooked: preparing your home for roof replacement. Proper preparation plays a pivotal role in ensuring a smooth and successful process while also safeguarding your investment for years to come.
It is essential to carefully follow a series of helpful steps that will assist you in thoroughly preparing your home, ensuring a seamless transition into the replacement process while safeguarding the lifespan, solidity, and aesthetic appeal of your beloved home, to start a successful and stress-free roof replacement journey.

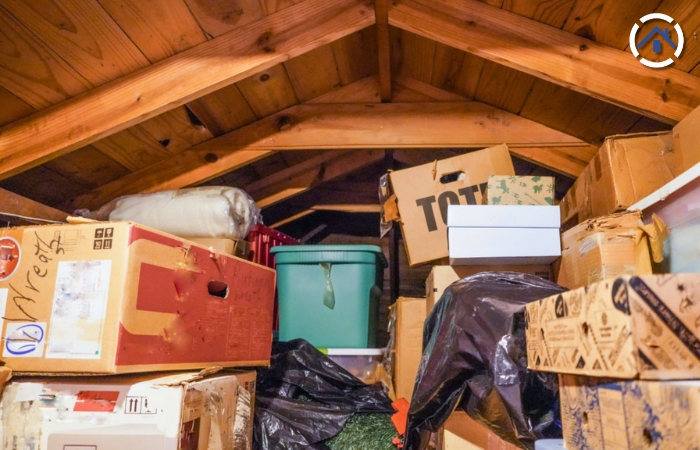
Clearing the attic of important or fragile items and covering them with blankets or tarps is a vital step in safeguarding your belongings from potential damage caused by falling debris and dust that may find its way through the decking boards. By removing or covering these items, you create a barrier against dust accumulation and debris infiltration, preserving their condition throughout the roof replacement process.
Additionally, covering the insulation with tarps or blankets helps maintain its thermal performance, ensuring proper insulation and energy efficiency in your home. By prioritizing the protection of your belongings and the functionality of your attic space through careful preparation, you demonstrate a proactive approach that minimizes the risk of damage and promotes a cleaner and safer environment during the roof replacement process.
When undergoing a roof replacement, it is common practice for roofing contractors to cover flowers or shrubs with tarps as a protective measure. However, it is crucial to understand that despite this precaution, there is still a possibility of debris or shingles falling with significant force. Therefore, it is highly recommended to go the extra mile in safeguarding items of particular importance or sentimental value by utilizing sturdy metal cages or temporarily relocating them to a secure area, if feasible.
By taking proactive measures to protect your cherished belongings, you can ensure their safety and prevent potential damage caused by accidental impacts or falling materials. Prioritizing the protection of your valuables during the roof replacement process is a responsible step to minimize any potential risks and maintain the integrity of your treasured items.
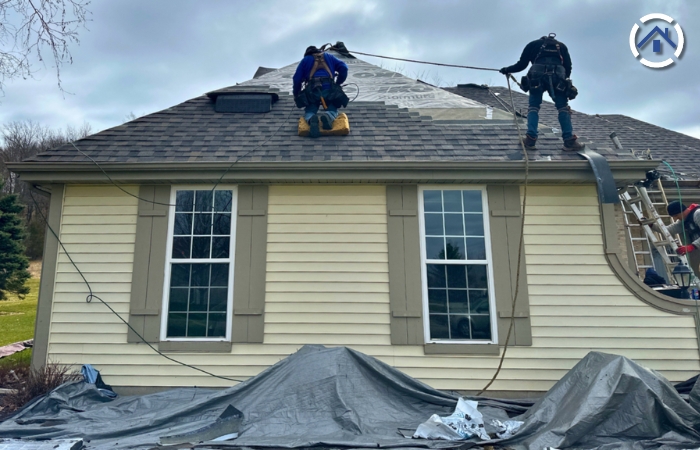
During the roofing operation, it is important to be mindful of potential hazards that can arise, especially when it comes to nails. As the roof is being replaced, numerous nails may inadvertently fall into the yard and, more importantly, onto the driveway. This situation poses a risk, particularly if vehicles are not moved out of the driveway during the construction process. Failing to relocate your car can result in the unfortunate event of driving over nails and ending up with flat tires as you pull out.
To prevent any inconvenience or damage to your vehicles, it is highly recommended to plan ahead and move them to a safe location away from the immediate vicinity of the roofing project. This proactive step ensures that your cars remain protected from any stray nails that may find their way onto the driveway. By taking the time to move your vehicles out of harm's way, you can save yourself the hassle of dealing with flat tires and potential repairs.
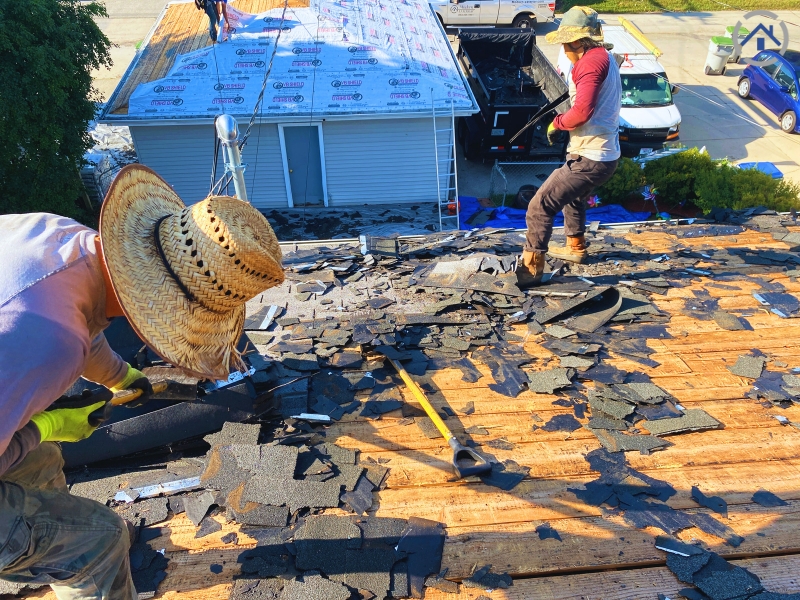
Having a roof replacement project entails a significant amount of noise and commotion within the home. The process involves the removal of thousands of nails from the existing roof structure, followed by the installation of new roofing materials, which means thousands of nails being driven back into place. This extensive nail work can create a cacophony of sound, including the relentless pounding of hammers and the rapid-fire bursts of nail guns, making it a less-than-ideal environment for those seeking peace and quiet.
The noise generated during a roof replacement can be disruptive and potentially bothersome to homeowners and their families. The constant hammering and the intermittent bursts of nail guns reverberating throughout the house can make it challenging to concentrate, relax, or engage in daily activities. It is important to be prepared for high levels of noise and potential disturbances during the roof replacement process.
In conclusion, taking the necessary steps to prepare your home for a roof replacement is essential for a smooth and successful project. By following the recommended steps, such as clearing the attic of important or fragile items, protecting valuable possessions, covering insulation, and relocating vehicles, you can minimize the risk of damage and ensure a safer environment throughout the process.
Preparing your home not only safeguards your belongings but also contributes to the efficiency and effectiveness of the roof replacement, allowing contractors to work more efficiently and minimizing potential delays. By prioritizing preparation, you demonstrate a proactive approach to caring for your home and preserving its integrity. So, before heading on a roof replacement project, remember to invest the time and effort in preparing your home, ensuring a successful and worry-free experience.
If you feel overwhelmed or unsure about any aspect of preparing your home for a roof replacement, don't hesitate to seek the assistance of a roofing professional. These experts have the knowledge, experience, and specialized tools to handle the intricacies of the job effectively. They can guide you through the necessary steps, provide valuable advice, and ensure that your home is well-prepared for the upcoming roof replacement.
It’s not simply the shingles you see from the street that makes up your roof. A complete roof system comprises a variety of different roofing materials and components.
To keep you and your loved ones safe from the weather, every section of your roof plays a critical role. Your decking and flashing, for example, do not need to be changed.
When you get a new roof, you have to eliminate almost all of your old roofing materials and accessories.
When you’re done reading this, you’ll have a comprehensive understanding of your roof’s anatomy and the key signs to look out for a roof replacement.
The hardwood planks that make up your roof’s structure are decking. Installing your roof’s shingles and other elements begins with these planks.
Roof decking may need to be changed when a roof is replaced. If your roof requires replacement, you won’t know for sure until the old one is removed.
Your roofing contractor will have to repair any rotten boards they uncover before they can begin installing your roofing materials.
Your shingles are protected from the elements by a layer of metal called roof flashing when they contact anything like a wall or chimney. If you acquire an asphalt roof, you won’t necessarily have to repair your flashing.
A roof replacement is not necessary if the metal in your flashing remains intact and free of corrosion. Roof flashing must be changed if broken, corroded, or if you’re switching from a 3-tab to a dimensional asphalt shingle.
You may use underlayment to protect your decking by covering it with felt (15 lb, 30 lb, or synthetic) material. It is essential that you incorporate the installation of new underlayment as part of your roof replacement.
Remember that your underlayment is the final line of protection for your decking in your roofing system.
The drip edge is a metal flashing fitted around your roof’s margins to keep water away from your fascia and other roofing components.
When installing a new asphalt roof, the drip edge must be changed. Having it on your roof serves as a code for intrusion detection. You may be penalized if the system isn’t built correctly during a home inspection.
If you select a contractor who skimps on the drip edge installation, you’ll have to address the problem before listing your house for sale if you don’t want this to happen to you.
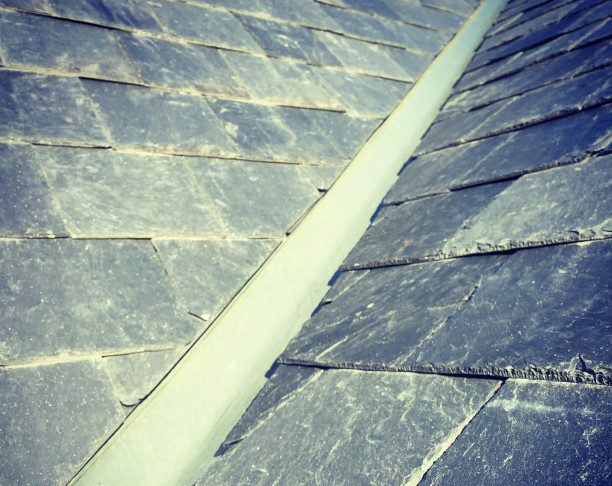
To keep water flowing down your roof in the correct direction, you need to have correctly functioning roof valleys. The steady flow of water every time it rains necessitates the deployment of a barrier.
When protecting your roof against ice and water damage, you’ll want to utilize Ice and Water Shield.
A new roof replacement will need the installation of ice and water around your roof penetrations and in the valleys of your roofs. During routine roof care, keep the valleys free of any debris.
Water will pool on your shingles or soak through the shield, eventually reaching the decking underneath and creating leaks.
The shingles can be seen on the outside of your roof and are one of the main things people think about a new roof.
As a result, you may be sure that any roof replacement will contain shingles. Keep in mind that proper roofing procedures must be used while installing your shingles.
At the point where two slopes of a roof meet, ridge capping is the trim to finish the look. Their pre-bent shape allows them to conform to your roof’s ridges, making them thicker than standard shingles.
During a roof replacement, the ridge capping must be rebuilt. It’s important to know that some roofing contractors attempt to minimize expenses by using 3-tab asphalt shingles as ridge capping.
One of the most frequent roof leaks may be caused by using these. To ensure that you’re obtaining the correct ridge capping for your roof, you should always review your estimate with your contractor before signing it.
Your roof’s lifespan will be severely shortened if it does not have enough attic ventilation to remove the accumulated hot and cold air.
In other words, if you’re replacing your roof, you’ll also be getting new vents for it. It’s entirely up to you whether or not you want to stick with the current kind of vents or switch to something different.
This essay on the significance of appropriate attic ventilation might help you better understand your vent choices and how they influence your roof.
To stop water dripping into your house, you must cover your roof’s pipes. To help with this, pipe boots are a must-have. When installed around your roof’s penetrations, pipe boots prevent water seeping in. Getting a new asphalt roof necessitates the replacement of these.
One of the most typical leaks a roofing contractor encounters is the damaged pipe boot. Regular inspection of your pipe boots as part of your roof maintenance is thus very essential.
When you have an asphalt roof replacement, you’ll have to replace most of your roof system’s parts and accessories. However, if your deck and flashing are still in excellent shape, you may not need to replace them.
If you haven’t constructed your house from the start, you’ll need to determine how old your roof is before making any repairs.
Aside from helping you prepare for a new roof, knowing how old your old one is will help you foresee issues and what you can do to avoid them in the future.
Determine the age of your roof with these objectives in mind.
It would be best if you didn’t shut off all communication with the previous owners after closing on your house and moving in. Asking about the house’s condition, such as how long ago it was last re-roofed, is something that most homeowners are happy to help with.
You don’t have to hire a lawyer to inquire about these matters. A long-time home resident is likely to know the exact date when the existing roof was put on.
Enquire with your local building department to see whether a permit is required for new roof installations.
If this is the case, you may get a copy of the permission by contacting the county administration. This will provide you with the precise date the roof was built and is one of the most reliable sources of information.
The previous owners may remember the roofing firm that renovated the roof. It’s possible, though, that they’ve already lost their receipt.
As long as you know who owns the company, you can request a copy of the receipt from them, or you may ask for it from the prior owner. It’s common for roofing companies to keep track of all their work.
A house inspector might be hired if everything else fails to determine the roof’s condition and estimate its age.
Such experts have a great deal of experience in their specialty. Whether you ask them, they’ll be able to tell you right away if you’re showing indications of old age.
A roofing firm can provide the same level of service. The impartiality of a house inspector, who does not have a product to promote, will likely be better than that of an expert sent by a firm that installs roofs.
It is possible to replace a worn or damaged roof with a new one. Even though the roof is more than 25 years old, it does not need to be changed. However, some key signs indicate that your roof is beyond repair, signs that signal that you need a new roof. They include:
Several factors contribute to curled shingles, including high winds, prolonged exposure to heat, and time.
The shingles on your roof cannot do their job correctly if they’ve curled, so they must be changed to preserve your roof.
When shingles fall off the roof, it’s a sure indicator that the glue holding them in place has failed.
After a certain amount of time, this is a sign that your roof needs to be replaced. During a heavy storm, loose shingles might fly off the roof, causing damage to nearby houses and even harm to bystanders.
Your roof’s valleys allow water to be drained from it. If they stop working, your roof will deteriorate, and water damage will spread throughout your house.
Round-Up: How to Know if There’s A Roof Replacement on Your New Home!
To replace your roof, you’ll need the skills and expertise of a roofing company. The process of installing a new roof is both time-consuming and challenging. No matter how much you like making things, this is not the type of project you should do.
The primary function of a roof is to shield your house from the elements. For example, if it isn’t properly placed or is constructed with defective materials, it may cause long-term damage to the inside and outside of your house.
The roof condition is the most significant consideration when purchasing a home. It must be mold-free and require no upkeep. Make that there are no cracks or holes.
If you see that some shingles are missing and patches are visible, the roof is relatively old.
Roof replacement is a standard procedure, but maintenance work can be pricey.
If the roof needs replacement, but the home is generally in decent shape, and you receive a substantial enough reduction on the price, there’s no need to pass up the house if you like everything else about it.
But you could have trouble receiving purchase financing until AFTER the roof is fixed.
Sooner or later, every roof needs replacing, even slate! ( But slate can survive millennia!) Be cautious but don’t be terrified.
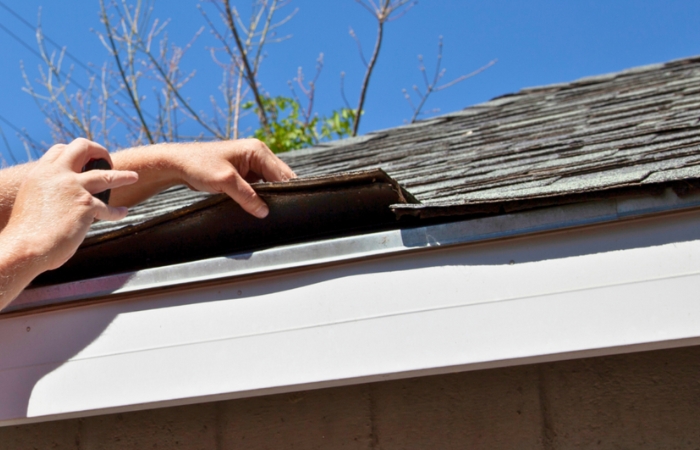
A sagging roof is a frequent concern among homeowners. When shingles or other roofing materials appear to "bow" or "bend" at different spots, it could signify various issues.
If you notice your roof sagging, it's crucial to consult a professional roofer in your vicinity without delay. Although a sagging roof may not always be structurally compromised, it can cause more significant problems if left unaddressed.
Here's what you should know about the potential reasons behind your sagging roof.
YOUTUBE VIDEO
Roofing materials, snow, ice, and debris can add significant weight to your roof. Over time, this weight can cause the roof structure to sag. Roofs are designed to hold a certain amount of weight, and exceeding this limit can lead to sagging.
Water can be a roof’s worst enemy. Leaks and poor drainage can lead to water seeping into the roofing materials and the underlying structure, causing them to weaken and sag. Long-term exposure to moisture can also lead to rot, further compromising the roof's integrity.
A roof that wasn't installed correctly can have numerous issues, including sagging. Improper alignment, inadequate support, or substandard materials can all contribute to a roof that doesn't hold up over time.
All roofing materials have a lifespan. As they age, they can deteriorate and lose their strength. Shingles may crack, wooden supports may weaken, and other components may degrade, leading to a sagging roof.
Problems with the structural elements of your home, such as the walls or foundation, can impact the roof. Shifting foundations or walls that are not properly aligned can cause the roof to sag as the support it relies on becomes compromised.
Roofs require proper support to maintain their shape and strength. If the support beams or trusses are insufficient or have been damaged, the roof may begin to sag. This could be due to poor initial design, damage over time, or modifications that didn’t account for the structural needs.
Regular maintenance is key to ensuring the longevity of a roof. Failing to address minor issues can lead to more significant problems down the line, including sagging. Regular inspections and timely repairs are essential to prevent such issues.
Using the attic for storage might seem like a good idea, but overloading it can put extra stress on the roof structure. Excessive weight from stored items can push down on the roof, leading to sagging over time.
Some roofs are designed with inherent flaws that can cause sagging. This could be due to miscalculations in the design phase or choosing a style of roof that isn’t suitable for the building’s structure.
Termites, rodents, and other pests can cause significant damage to the wooden elements of a roof. This damage can weaken the structure, leading to sagging. Regular pest control measures can help prevent this issue.
Identifying a sagging roof can be challenging from the ground due to the slope of most roofs. However, here are some tips to help you assess whether your roof is actually sagging or if it’s an optical illusion:
If you suspect your roof might be sagging, it's crucial to contact a roofing contractor. They can evaluate the roof's structure, identify the cause and extent of the sagging, and suggest appropriate repair options.
A sagging roof is a serious issue, compromising both safety and structural integrity. Fortunately, there are several preventive measures you can take to avoid this problem.
Prevention is the best approach for many issues, including roof sag. Here are some steps to ensure you never have to deal with a sagging roof:
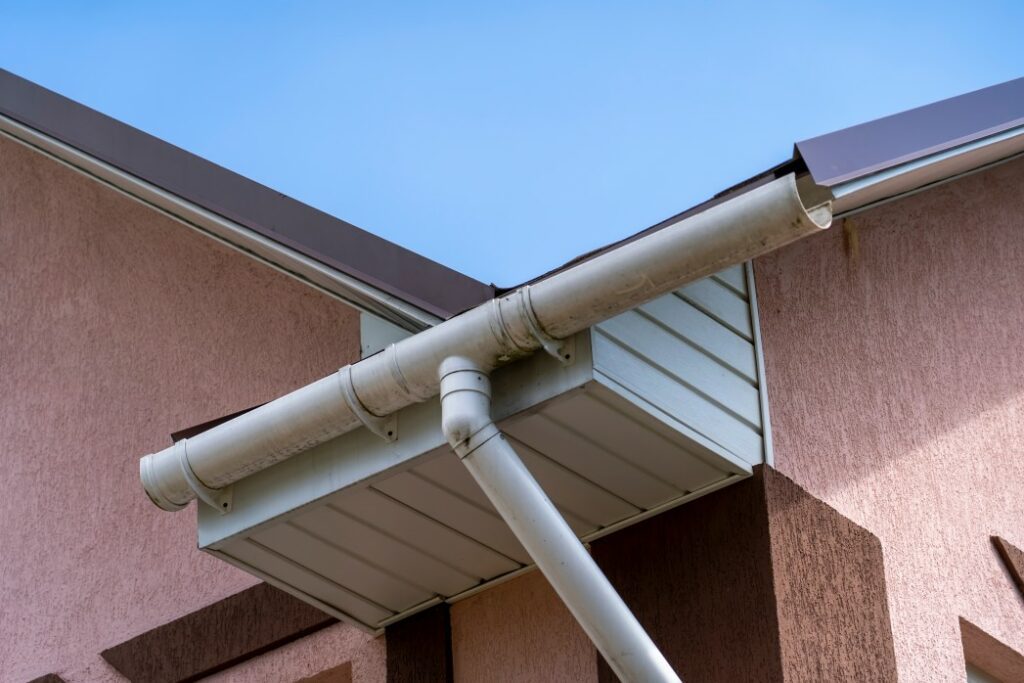
Gutters play a crucial role in your roofing system by directing water away from the roof and structure, thus preventing water damage. Regularly clean your gutters to ensure they are free of dirt, leaves, and debris so they can function properly.
Ensure your roof is not overloaded with heavy materials, snow, ice, or debris. Regularly remove accumulated snow and ice during the winter, and keep the roof clear of debris.
Fix leaks and ensure proper drainage to prevent water from seeping into the roofing materials and underlying structure. Regularly inspect your roof for signs of water damage and address any issues immediately to avoid rot and weakening of the structure.
Hire reputable and experienced roofers for installation to ensure your roof is correctly aligned, adequately supported, and made of high-quality materials. A well-installed roof is less likely to sag over time.
Be proactive about replacing roofing materials that have reached the end of their lifespan. Regularly inspect your roof and replace any aging or deteriorating materials to maintain its strength and integrity.
Monitor your home’s structural elements, such as walls and foundations, to ensure they are stable and properly aligned. Address any structural issues promptly to prevent them from impacting your roof.
Ensure your roof has proper support from beams and trusses. Regularly inspect these supports for damage and reinforce them if necessary to maintain the roof’s shape and strength.
Regular maintenance is key to preventing roof sag. Schedule routine inspections and address minor issues before they become major problems. Timely repairs can significantly extend the life of your roof.
Be mindful of how much you store in your attic. Avoid overloading it with heavy items that can put extra stress on the roof structure, potentially leading to sagging.
Ensure your roof design is appropriate for your home’s structure. Consult with professionals to avoid inherent design flaws that could lead to sagging.
Regularly check for signs of pests like termites and rodents that can damage the wooden elements of your roof. Implement pest control measures to protect the roof’s structural components.
By taking these preventive measures, you can protect your roof from sagging and ensure its longevity and safety.
Before repairing a sagging roof, it's crucial to accurately assess the extent of the damage to determine whether repair or replacement is necessary. Given the complexity and safety risks involved, it's recommended to consult a professional roofing contractor for an inspection.
Here are the steps to assess the damage to your roof:
By following these steps and seeking assistance from a qualified professional, you can ensure that your sagging roof is repaired safely and effectively, preserving the safety of your home and its occupants.
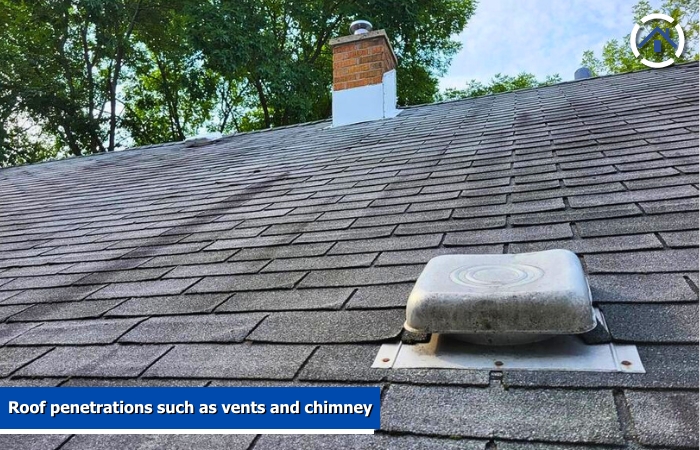
Roof penetrations are necessary for many functional aspects of a home, such as plumbing and ventilation. However, these penetrations can sometimes become sources of leaks if not properly managed.
One common type of roof flashing is the pipe boot, which is designed to seal around pipes that extend through the roof. Understanding how a pipe boot can cause roof leaks is crucial for maintaining the integrity of your home and preventing water damage.
In this blog, we will explore what a pipe boot is, how a pipe boot can cause roof leaks, and how to identify and prevent these leaks effectively.
A pipe boot is a type of flashing that is specifically designed to create a watertight seal around pipes that penetrate the roof. Its main purpose is to prevent water from entering the roof structure through the gap around the pipe. Pipe boots are typically made from materials like rubber, silicone, or metal, each offering different levels of durability and flexibility.
You will often find pipe boots installed around plumbing vents, furnace flues, and other types of roof penetrations. Proper installation is critical, as even a small gap or misalignment can lead to significant water damage over time.
Here are the common causes of leaks due to pipe boots:

Over time, exposure to harsh weather conditions can cause the materials of a pipe boot to deteriorate. The constant exposure to UV rays from the sun can break down the material, leading to cracks and brittleness. Temperature fluctuations also play a significant role, as the expansion and contraction caused by extreme heat and cold can weaken the pipe boot.
Additionally, moisture from rain, snow, and humidity can seep into small cracks and exacerbate the deterioration. This combination of factors gradually makes the pipe boot less effective at sealing, increasing the risk of leaks and water damage to your roof and home.
If a pipe boot is not installed correctly, it can leave gaps or misalignments that allow water to seep through. This could be due to incorrect sizing, poor placement, or insufficient sealing around the edges.
Physical damage from animals, such as birds or squirrels, or from falling debris can create holes or tears in the pipe boot. This damage compromises the watertight seal and can lead to leaks.
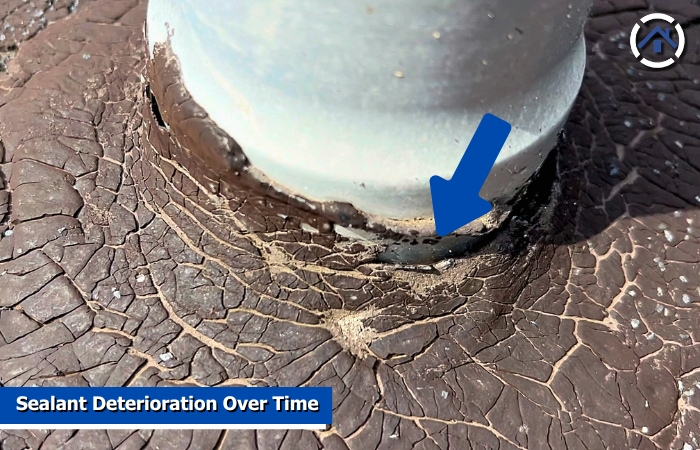
The sealant used around the edges of the pipe boot can break down over time due to exposure to the elements. As the sealant deteriorates, it loses its ability to effectively block water from penetrating the roof.
To identify a leak caused by a pipe boot, you should look for several telltale signs:
By following these preventative measures, you can significantly reduce the risk of leaks caused by pipe boots and maintain the integrity of your roof.
1. Regular Roof Inspections
Regular roof inspections are key to catching potential issues before they become major problems. Inspect your roof at least twice a year, and pay special attention to areas around roof penetrations like pipe boots, skylights, chimneys, and vents. Each of these penetrations has the potential to cause leaks if not properly maintained.
2. Timely Replacement of Aging or Damaged Pipe Boots
If you notice that a pipe boot is aging or has sustained damage, it's important to replace it promptly. It might seem like a small issue that can be put off for another day, but waiting too long can lead to more significant water damage and costly repairs. A tiny crack today can become a major leak tomorrow, causing damage to your roof, insulation, and even the interior of your home.
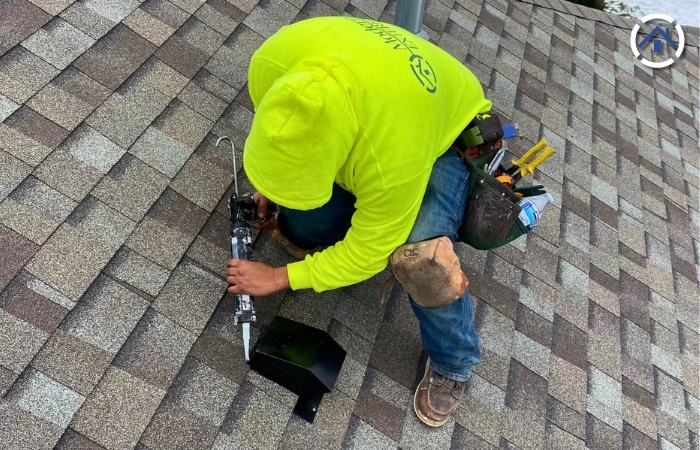
3. Proper Installation Techniques
Ensure that pipe boots are installed correctly the first time. Follow manufacturer guidelines and consider hiring a professional if you’re unsure about the installation process. Properly installed pipe boots will last longer and provide a more effective seal.
4. Use of High-Quality Materials and Sealants
Investing in high-quality materials and sealants can make a significant difference in the longevity and effectiveness of your pipe boots. Opt for durable materials that can withstand harsh weather conditions and high-quality sealants that provide a reliable watertight seal.
Understanding the role of pipe boots and other roof penetrations in maintaining a watertight seal is essential for preventing leaks and protecting your home. While these components are designed to be durable, they are susceptible to damage from aging, weathering, and physical harm. Regular inspections and timely replacements are crucial to catching problems early and avoiding costly water damage. Remember, addressing a small crack or gap today can prevent major headaches tomorrow.
If you're ever unsure about the condition of your roof or how to fix a potential problem, it's important to consult with roofing experts. Professionals can provide the expertise needed to ensure your roof remains in top condition, giving you peace of mind and a safe, dry, and comfortable home.
Roof maintenance is often overlooked but is profoundly important for homeownership. While roofs shield us from the elements, regular upkeep is crucial for ensuring the longevity and structural integrity of our homes. One pervasive threat is rust, which can corrode the metal components of our roofs, from exposed nails to vents.
Disregarding these seemingly minor imperfections can lead to substantial issues in the future. Therefore, let's discuss the importance of sealant on your roof in safeguarding these vital metal elements.
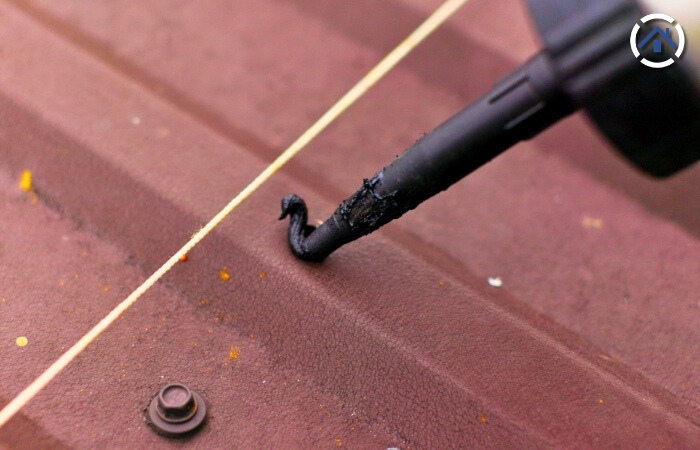
Roof sealant is a protective coating applied to various parts of your roof, including exposed nails and metal components. It’s designed to create a barrier against moisture, preventing rust and extending the lifespan of your roof.
Moisture Protection: Sealant acts as a shield against moisture, safeguarding metal components from rust and corrosion, which can significantly prolong the lifespan of your roofing materials.
Leak Prevention: By creating a waterproof barrier, sealant reduces the risk of leaks and structural damage, ensuring the integrity of your roof remains intact even during harsh weather conditions.
Cost-Effectiveness: Regularly reapplying sealant is a budget-friendly preventive measure compared to the potential expenses of extensive repairs or a complete roof replacement, making it a smart investment in the long run.
Exposed nails, vents, flashing, and other metal components are all part of your roof’s structure. These parts are crucial for keeping everything in place and ensuring proper ventilation. But here's the catch: they’re also exposed to the elements and are prone to rusting. When these metal parts rust, it can lead to leaks, structural damage, and even more extensive repairs.
Rust is what happens when metal meets moisture and oxygen—a chemical process known as oxidation. This reaction causes the metal to deteriorate, forming that familiar reddish-brown crust. While it might look harmless at first, rust can significantly weaken metal components, making them brittle and prone to breaking.
Rust on your roof is more than just an eyesore. It can lead to serious issues like leaks, which can damage the interior of your home, cause mold growth, and weaken the structural integrity of your roof. Imagine a storm hits, and those rusted nails can’t hold down the shingles. You’re looking at potential water damage and costly repairs. In some severe cases, entire sections of the roof may need to be replaced.
First things first, you need to know where to apply the sealant. Look for exposed nails, vents, flashing, and other metal parts. These areas are the most vulnerable to rust. Don’t forget to check around the chimney, skylights, and any roof penetrations. These spots often get overlooked but are prime targets for moisture.
Applying sealant is straightforward. Here’s a step-by-step guide:
Sealant, while effective, isn't immortal; it gradually wears down over time due to exposure to elements like weather, UV rays, and general wear and tear. It's essential to remain vigilant for indications that your sealant may be losing its efficacy. Look out for telltale signs such as cracking, peeling, or areas where it's visibly worn away. These are clear signals that the protective barrier provided by the sealant is compromised. Once you spot these signs, it's crucial to take action promptly.
Reapplication of the sealant is necessary to restore its protective properties and maintain the integrity of the surface it's applied to. By being proactive in monitoring the condition of your sealant and addressing any issues promptly, you can ensure continuous protection for the underlying surface, prolong its lifespan, and potentially save yourself from more extensive maintenance or repair down the line.
Regular roof maintenance might sound like a chore, but it’s essential. Your roof is constantly exposed to sun, rain, wind, and snow. Over time, even minor issues can escalate into major headaches.
Regular inspections are key to maintaining a healthy roof. Ideally, inspect your roof twice a year—once in the spring and once in the fall. Look for signs of rust, wear, and tear. Pay special attention to the areas where you’ve applied sealant. A tiny leak today can become a huge, costly repair tomorrow. Keeping an eye on your roof and addressing small problems early can save you a lot of trouble and money.
In summary, using sealant on exposed nails, vents, and other metal parts of your roof is a simple yet effective way to prevent rust and extend the lifespan of your roof. Regular maintenance and inspections can help you catch issues early and save you from costly repairs down the line. Don’t wait until you have a problem—take proactive steps now to protect your home. If you’re unsure about the process or need an expert’s touch, don’t hesitate to consult a roofing professional for an inspection or sealant application. Your roof—and your wallet—will thank you!
Is it time for a new roof on your commercial building, or are you selecting the first roof for a new construction? Regardless of your situation, it's essential to compare different types of commercial roofing options. With numerous materials and designs available, the first major decision you'll face is choosing between flat roofs vs pitched roofs. Both styles offer unique advantages, so understanding the differences between flat roofs vs pitched roofs will help you make an informed decision.
You know you need to replace your building’s roof, but you're faced with a dilemma: which type of roof is the right choice? Are there objective reasons why a pitched roof might be better than a standard flat roof?
To make an informed decision, it’s crucial to understand the structural differences between a pitched roof and a flat roof.
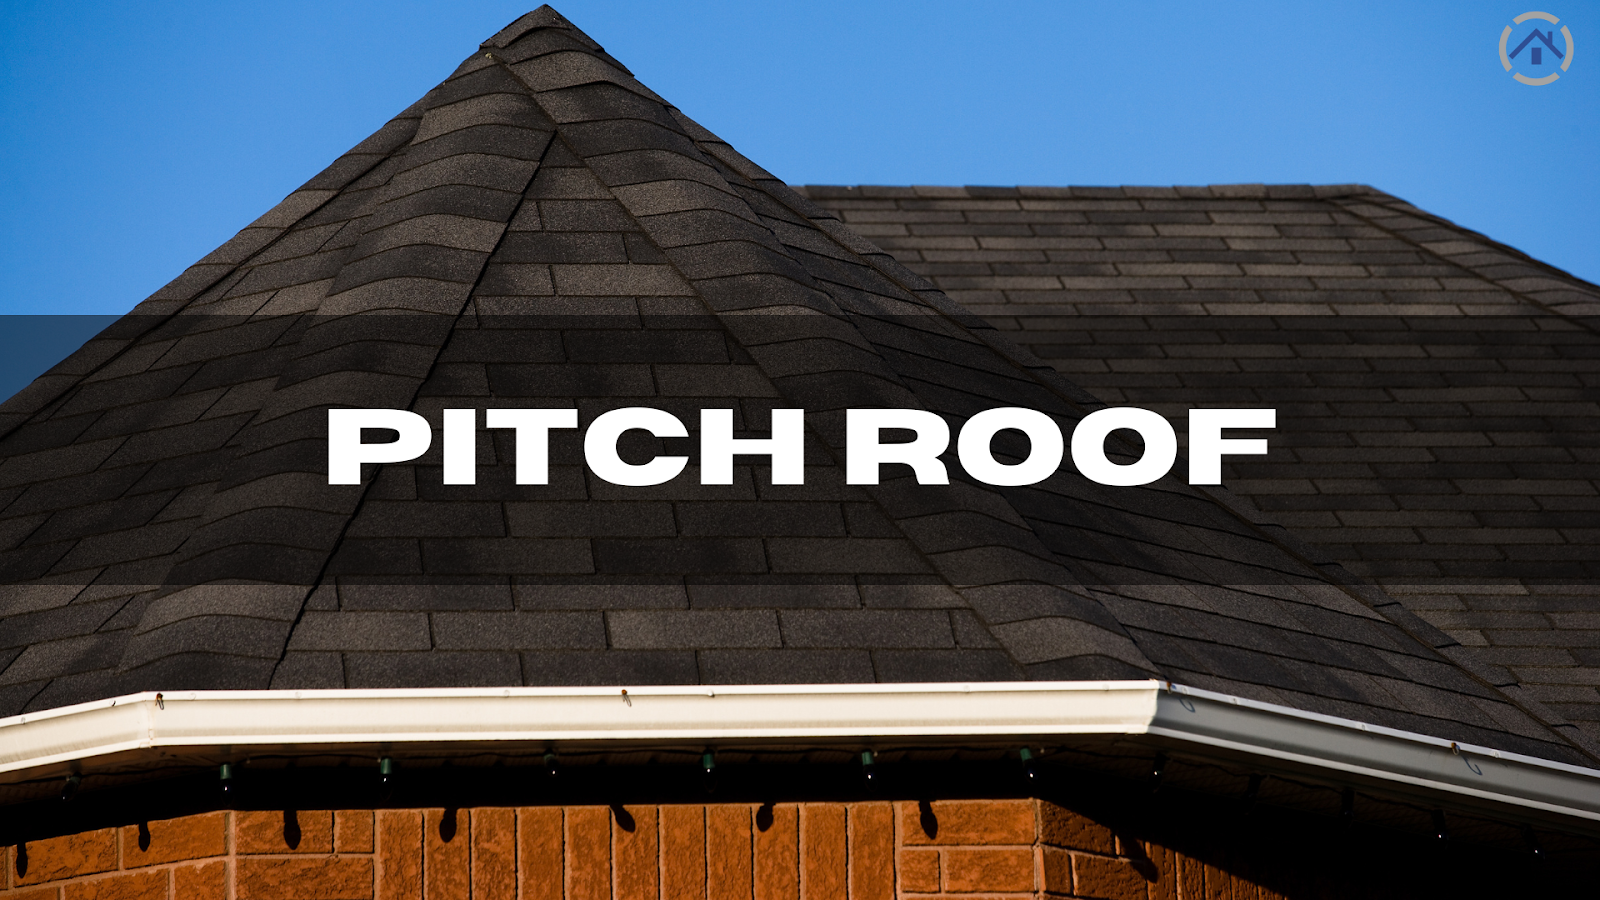
A pitched roof, often called a sloped roof, features a peak. This type of roof is a common choice for residential properties but is less typical for commercial and industrial buildings across the United States.
Pitched roofs come in various styles, with the simplest being the gable-ended roof, easily recognized by its triangular shape. While there are more complex pitched roof designs, they all share the fundamental characteristic of directing rainwater off the sloping surface to the edges of the building.
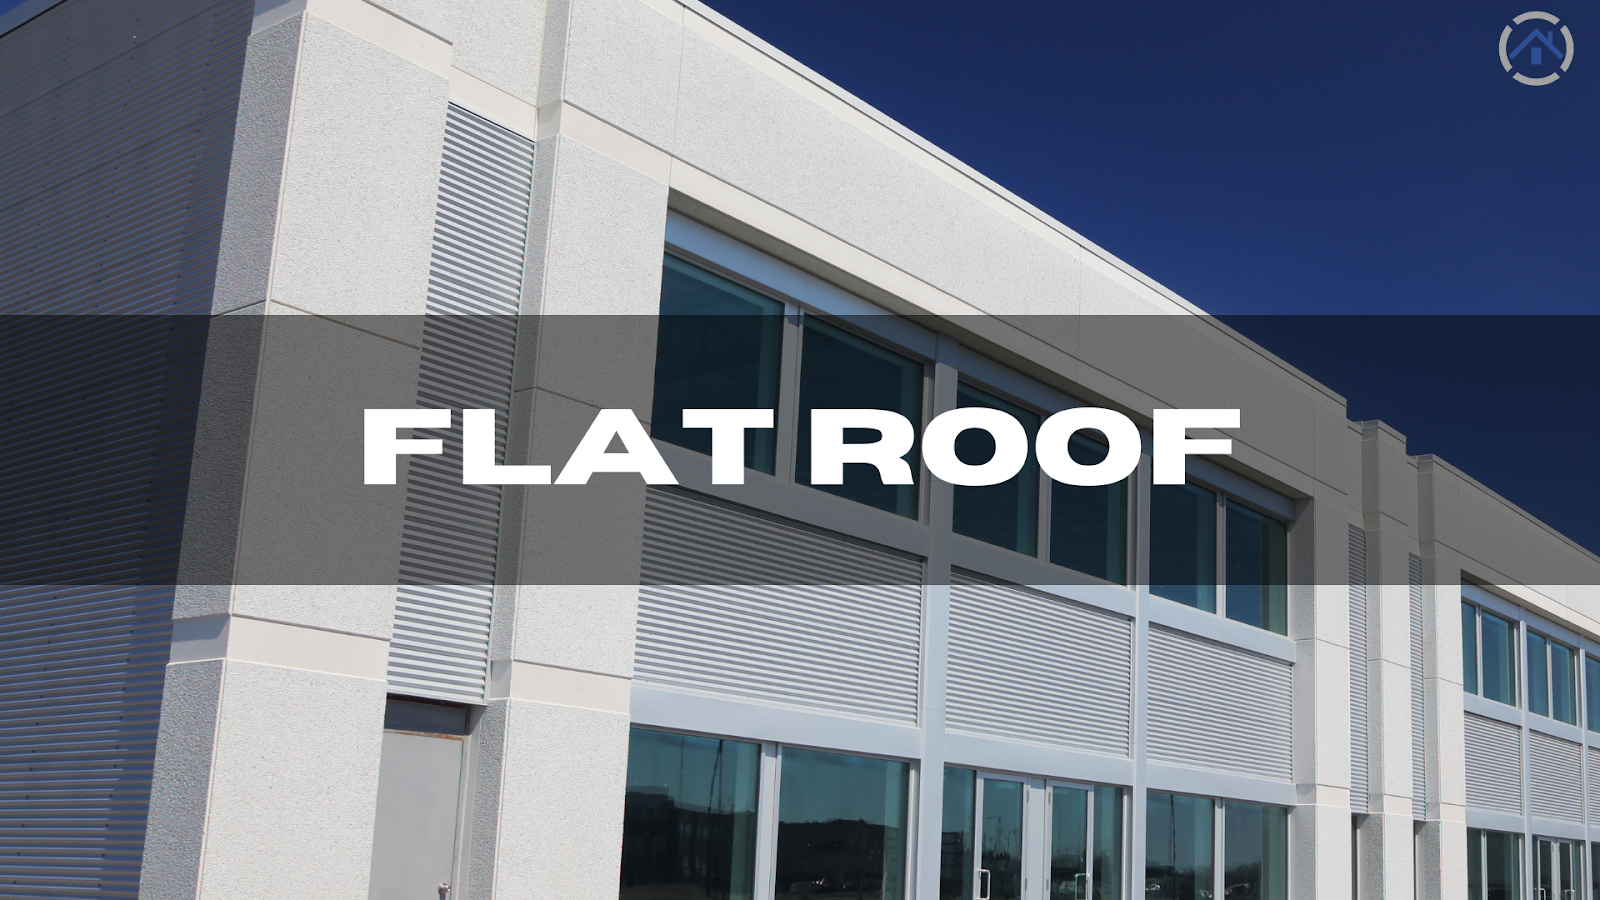
In contrast, flat roofing is the most prevalent style for commercial buildings and is also a hallmark of modern architectural designs.
Despite the name, flat roofs do have a slight slope (often referred to as a low-slope roof). This gentle pitch helps direct rainfall toward the edges of the building, preventing water from pooling in low areas.
Both flat roofs and pitched roofs come with their own sets of advantages and disadvantages, depending on your specific circumstances and the climate over the roof’s lifespan. Let’s compare these options to determine which is the best roof for your needs.
One major advantage of a flat roof system is its quicker and less disruptive installation on existing commercial buildings compared to pitched roof alternatives.
Flat roofs require less material and have a simpler construction process. This contrasts with the more complex and time-consuming installation of pitched asphalt shingle roofs. As a result, there is less disruption to the building's normal business operations, fewer materials are needed, and the simpler design ultimately leads to cost savings when compared to pitched roofs.
The combination of shorter installation times and reduced disruption costs makes flat roofs an appealing option for many building owners.
Furthermore, a flat roof design allows for the rooftop space to be used for outdoor purposes if designed appropriately. In recent years, many buildings have adopted green roofs or recreational areas by collaborating with commercial roofing contractors who are knowledgeable about the necessary construction methods.
The life expectancy of a flat roof is generally shorter than that of a pitched roof, necessitating frequent and thorough routine maintenance to extend its lifespan and prevent failures. Without proper upkeep, you might find yourself needing another roof replacement sooner than anticipated.
Even with a slight slope designed to encourage water runoff, a flat roof will never be as effective at displacing water as a pitched roof. This can result in ponding or standing water, which can lead to leaks and damage. Therefore, careful consideration and diligent maintenance of drainage systems are crucial for flat roofs.
Additionally, flat roofs are typically less energy-efficient than pitched roofs. They tend to lose more heat, which can lead to higher energy bills.
Pitched roofs are a common feature, especially in modern residential construction, and their aesthetic appeal is often more pleasing to the eye. However, the benefits of this type of roof extend beyond its appearance, which is why an increasing number of commercial buildings are adopting this option.
The design of a pitched roof offers significant versatility and can potentially provide additional interior space for storage or to house equipment such as heating, ventilation, and air conditioning units.
Sloped roofs are generally more durable than flat roofs and tend to have a longer lifespan. This durability is primarily due to their ability to efficiently remove rainwater and snow from the building, preventing water damage. Since water can be highly detrimental to a roof and the structure itself, quickly displacing it is crucial for longevity.
Consequently, a pitched roof requires less maintenance than a low-slope roof. Aside from occasional tasks such as replacing storm-damaged shingles or metal sheets and keeping gutters and downspouts clear of debris, there is usually little need for roof repair or replacement.
The primary drawback of a pitched roof is its typically higher installation cost compared to a flat roof. The construction process is also more disruptive and time-consuming, potentially causing interruptions to business operations while the project is underway.
Additionally, a pitched roof may not be suitable for certain buildings. Some modern structures are better suited to flat roofs, and a pitched roof might not be aesthetically appropriate.
While new constructions don't have to worry about disrupting daily business activities or fitting in with existing architecture, many commercial property owners find that the higher costs, potential for repairs, and likelihood of disruption make a flat roof a more practical solution.
Choosing between a pitched roof and a flat roofing system typically involves weighing multiple factors rather than a single consideration.
For example, for existing buildings where cost and ease of installation are critical, a flat roof often emerges as the more affordable and straightforward choice. However, depending on your building's architectural vision and overall requirements, a pitched roof might offer superior benefits. It's essential to carefully evaluate all aspects, including financial implications, insurance considerations, and warranty information.
For expert guidance tailored to your specific needs, contact a professional roofing contractor today.
Ultimately, the choice between a pitched roof and a flat roof hinges on balancing these factors according to your specific needs and circumstances. For existing buildings prioritizing cost-effective installation and minimal disruption, a flat roof often proves advantageous. However, for those seeking durability, superior drainage, and aesthetic appeal over the long term, a pitched roof may be the preferred solution.
To make the best decision for your commercial building's roofing needs, consult with a professional roofing contractor. They can provide tailored advice based on your building's design, climate considerations, and budget constraints. Contacting a roofing expert ensures you receive comprehensive guidance to achieve optimal roofing performance and longevity.
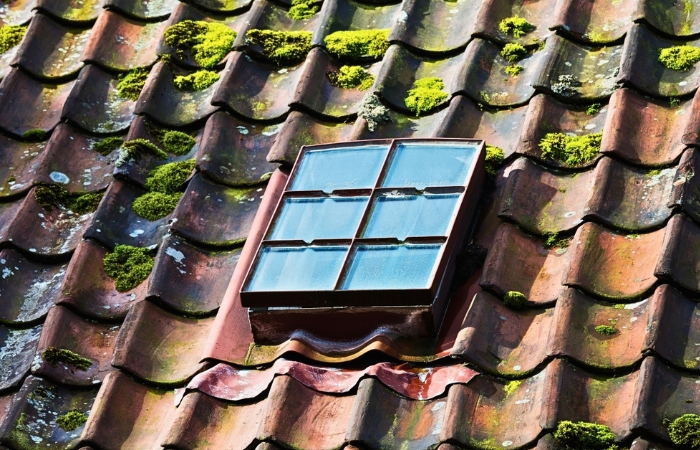
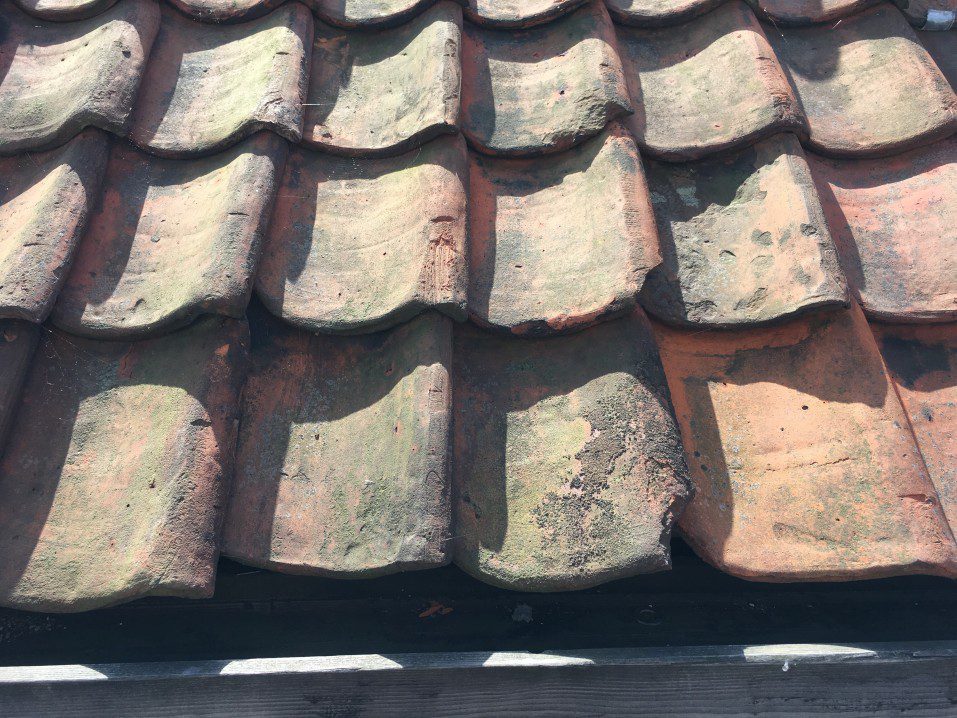
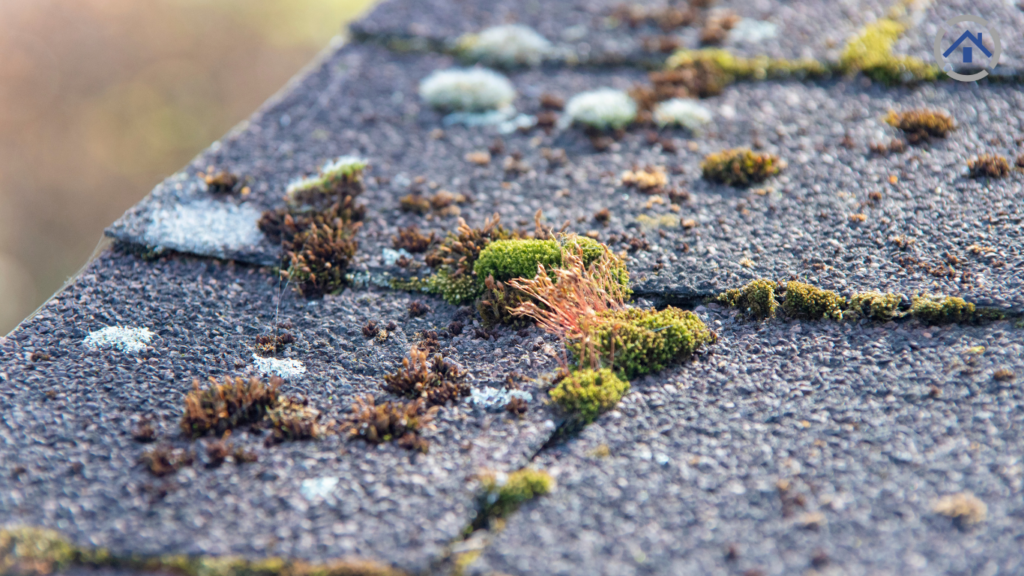
Have you ever noticed that green or brown growth on your roof? Moss or algae, these organisms not only affect the aesthetics of your home but can also pose a significant threat to the durability and longevity of your roof. Moss and algae might look nice on an old, weathered roof, but you don't want them sticking around. This is especially true if you live in a rainy area or have asphalt shingles.
In this article, we will explore the best way to remove moss and algae from your roof, understand how these growths damage your roof, and learn effective methods to prevent them.
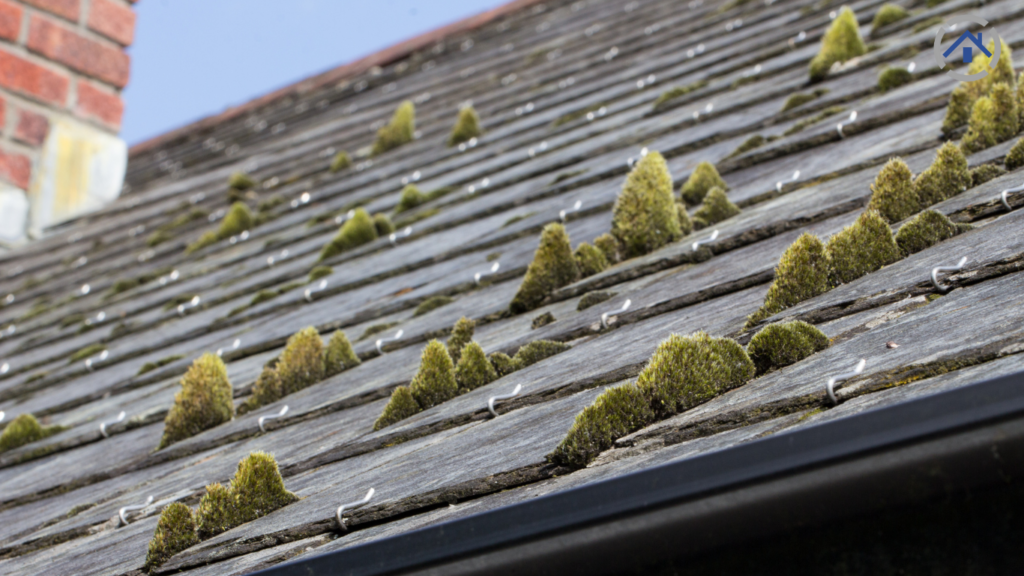
Moss is a common organism that can take root on your roof, particularly in Vancouver’s climate. It thrives in wet and humid conditions and can cause significant roofing issues if not removed.
Algae is another organism that may appear on your roof, especially in damp and humid environments. If left unchecked, it can lead to serious problems with your roofing.
Moss might not be immediately visible from the ground, but there are ways to get a closer look. Binoculars or even a drone with a camera can help you inspect your roof more thoroughly. When examining your roof, be sure to inspect every area, especially those that remain shaded for extended periods. Additionally, pay attention to any signs of discoloration or irregularities on the surface, as these could indicate the presence of moss or algae. Regular inspections and early detection can help you address moss growth before it causes any significant damage to your roof.
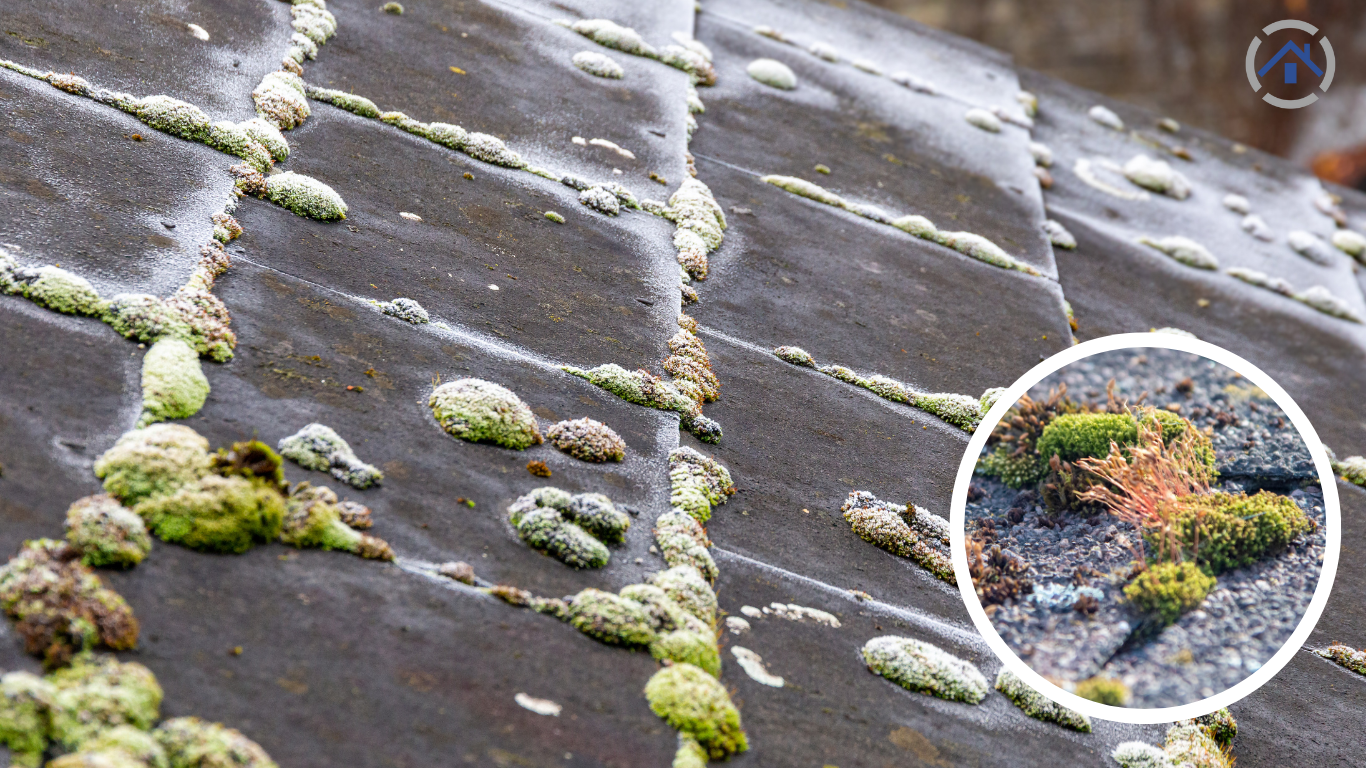
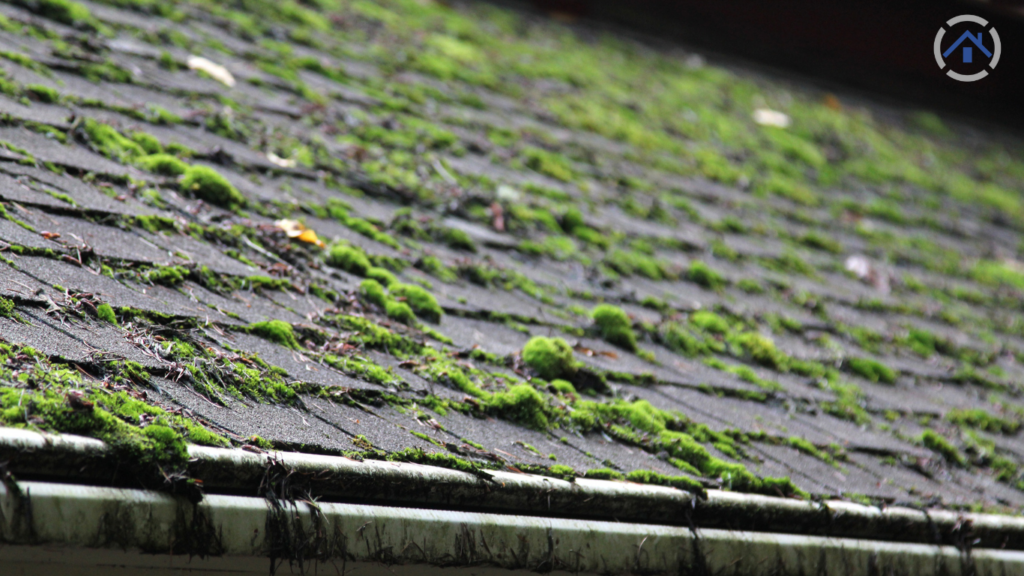
Identifying roof moss is fairly straightforward. It typically appears as green, fuzzy growths between shingles or on metal roofing surfaces. Additionally, you might notice the presence of algae, which manifests as black spots on the roof's surface. Another possible indication of roof moss is the presence of lichens, which resemble green plaques that can vary in texture, appearing either flat or textured. Regularly inspecting your roof for these signs can help you detect and address moss growth before it leads to more significant issues.
Call experts to remove moss from your roof as soon as you see it. While moss isn't a health risk like mold, it can damage your shingles and might lead to needing a roof replacement. The most common issue with moss, however, is that it reduces your home's curb appeal.
Some power washers claim that moss and algae are "eating" your roof. While this is somewhat true, it takes a long time for them to affect your shingles' performance. However, they do make your roof look unattractive, which is the main reason people clean their roofs.
Moss can also block your gutters and prevent proper drainage in your home. Hiring a moss removal service is the best way to solve these practical and aesthetic problems.

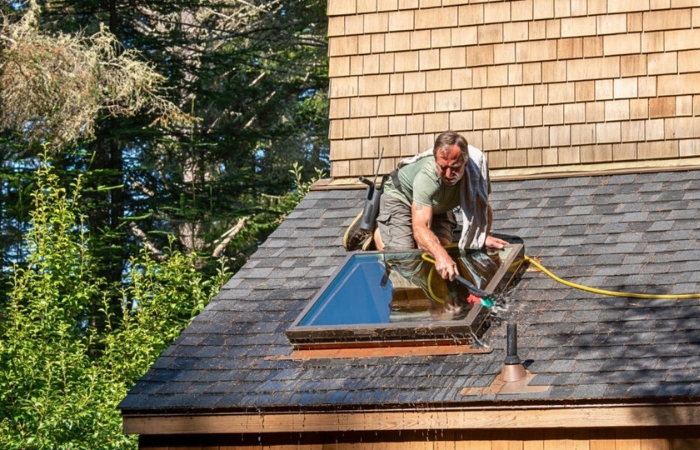
Working on a roof can be dangerous. Wear protective gear such as work boots, thick pants, and a hard hat or helmet. Ensure your harness is in good condition and properly anchored. It's also important to have someone with you to hold the ladder or call for help if needed.
Preparing to remove moss from your roof is straightforward. Make sure you're wearing proper safety gear, your ladder is sturdy, and your safety harness is correctly installed according to the manufacturer's instructions.

While attempting to remove moss and algae by yourself is an option, it's crucial to proceed with caution. Rushing or being careless during the process can lead to damage to your roof. This damage might be more expensive to repair than hiring a professional roofer in the first place. Additionally, roofing experts have the knowledge and experience to effectively remove moss and algae without causing harm to your roof. They also have access to specialized equipment and cleaning solutions that may not be available to the average homeowner. Hiring a professional can save you time, effort, and potentially costly repairs in the long run.
To prevent moss from growing on your roof, it's essential to ensure that sunlight can reach it. Trimming overhanging tree branches not only promotes sunlight exposure but also safeguards against storm damage. Additionally, keeping your gutters clean is crucial for maintaining proper water drainage from your roof, which can further inhibit moss growth. Moreover, installing metal strips along the peak of your roof on both sides can be an effective long-term solution to deter moss from taking hold. Regular maintenance and these preventative measures can help keep your roof moss-free and in good condition for years to come.
Moss and algae growth on your roof not only affect the appearance of your home but can also cause significant damage if left unchecked. It's important to regularly inspect your roof for any signs of moss or algae and take prompt action to remove them. Whether you choose to tackle the removal yourself or hire a professional, safety precautions must be followed to prevent any further damage to your roof. Additionally, implementing preventive measures such as ensuring sunlight exposure, keeping gutters clean, and installing metal strips can help deter moss growth in the future. By taking these steps, you can maintain the durability and longevity of your roof, ensuring it remains in good condition for years to come.